Illustrations
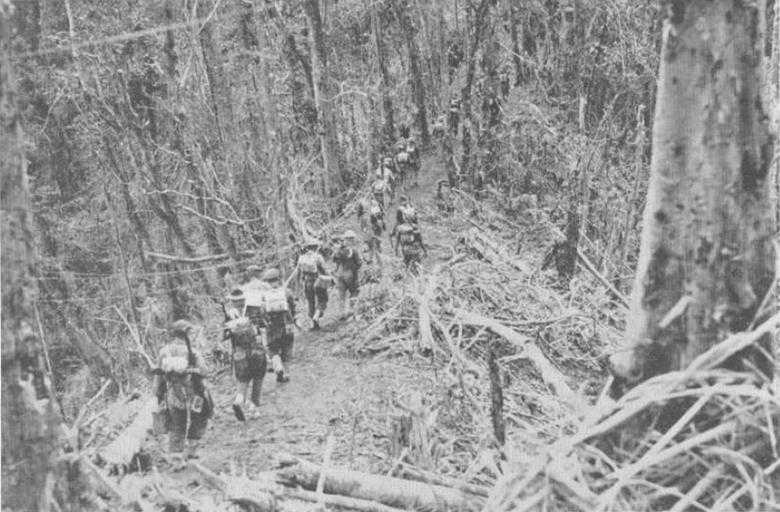
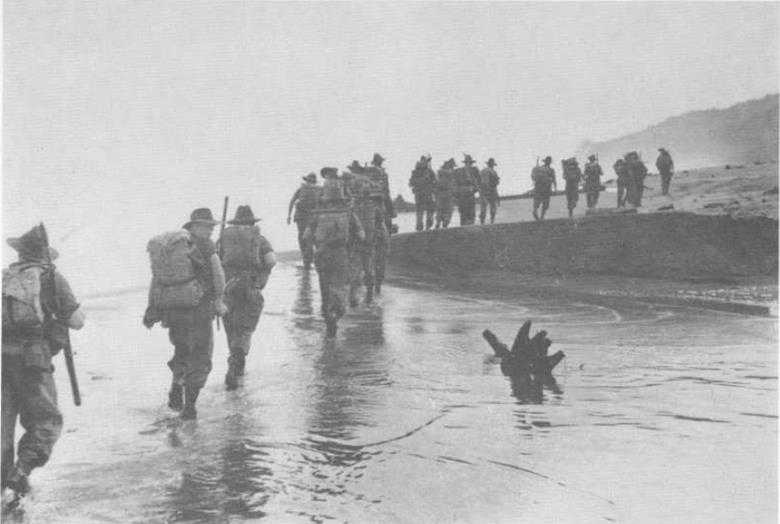
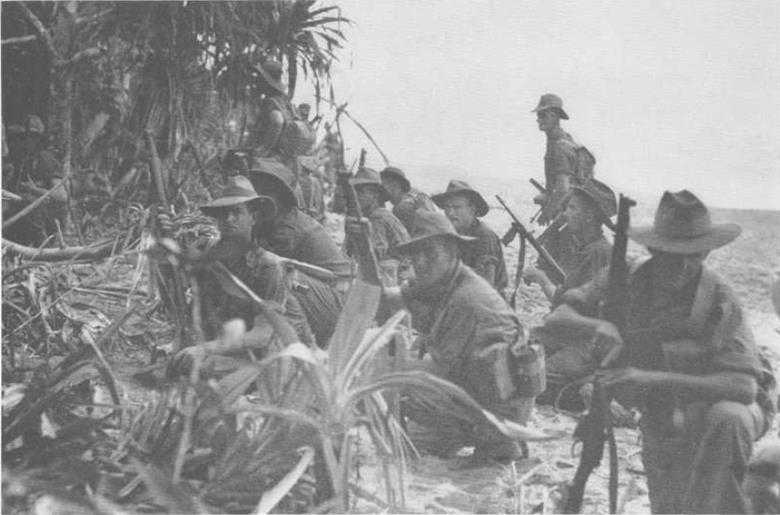
A company of the 25th Battalion moving from Arty Hill to Little George, in the central sector. Bougainville, 30th December 1944. (Australian War Memorial)
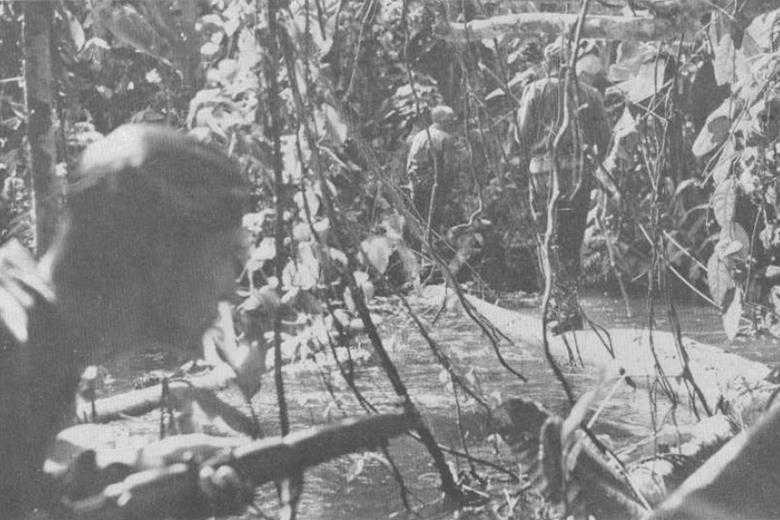
A patrol of the 42nd Battalion in the Motupena Point area, 21st January 1945. (Australian War Memorial)
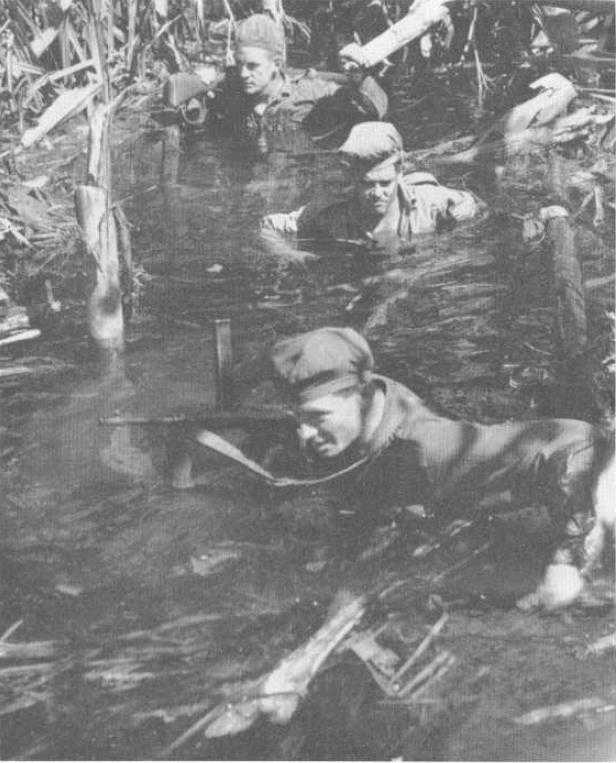
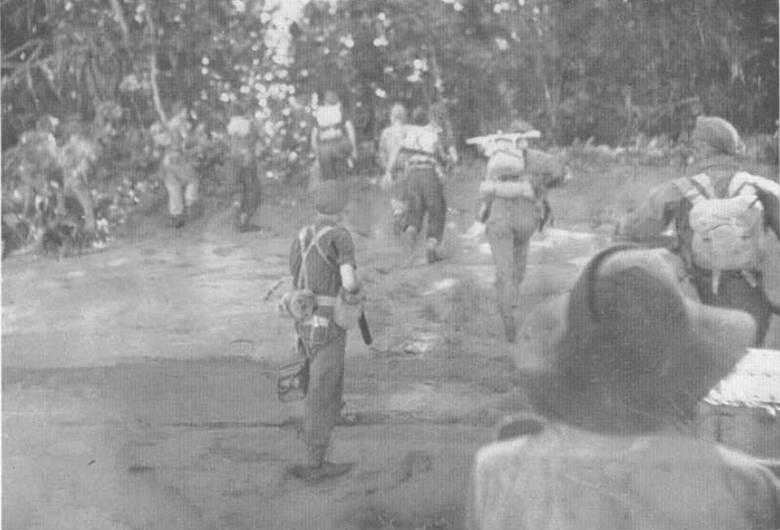
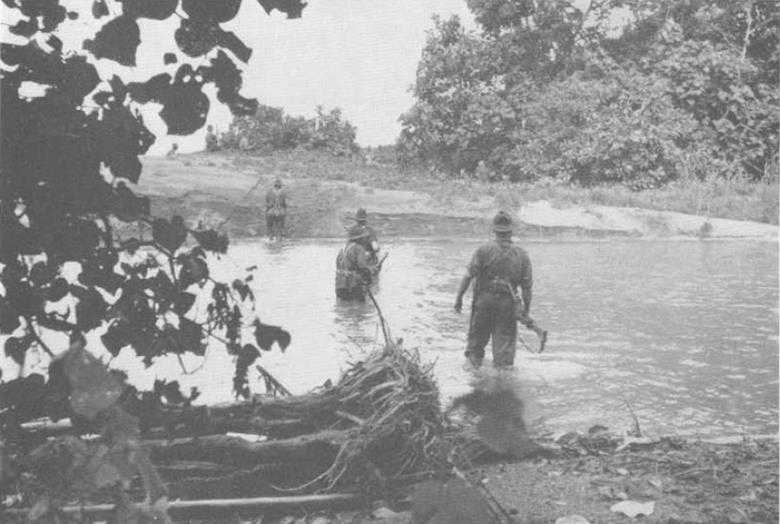
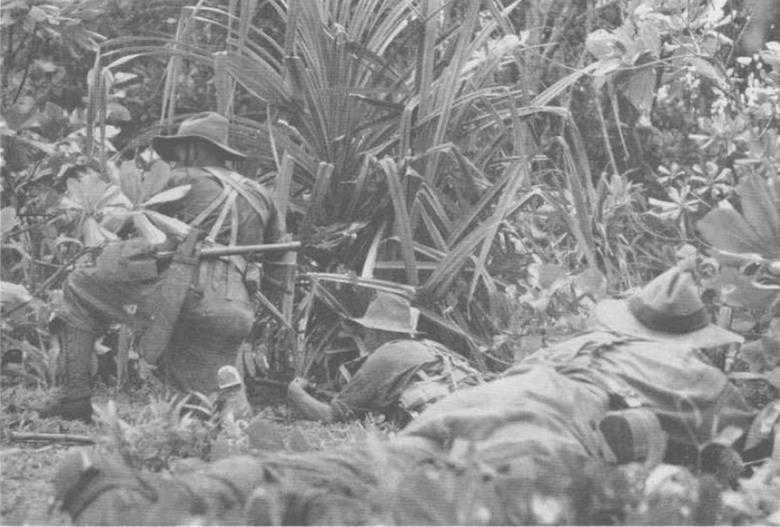
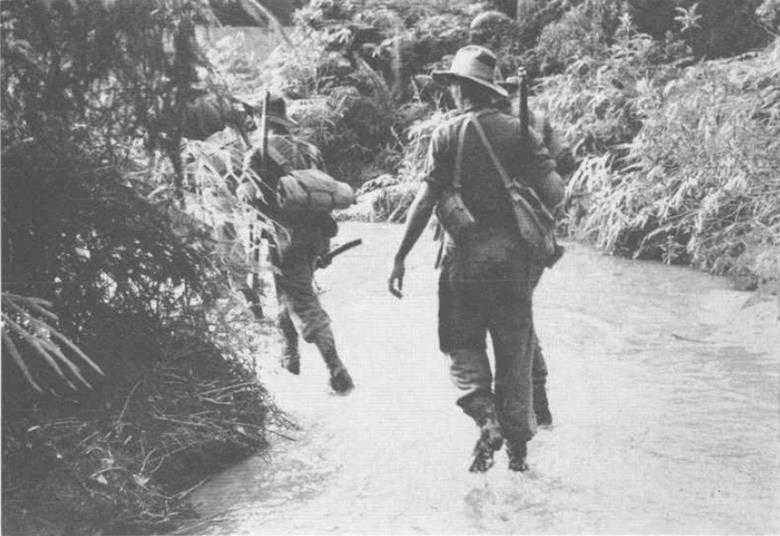
A patrol of the 42nd Battalion moving through swamp in the Mawaraka area. Bougainville, January 1945. (Australian War Memorial)
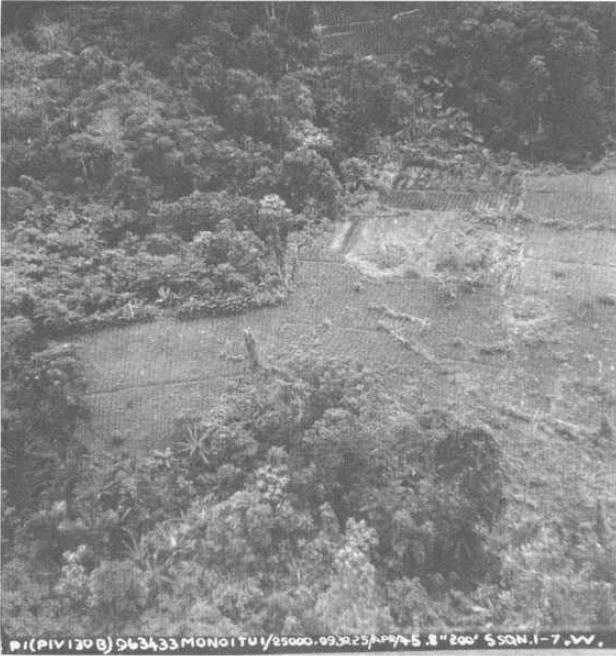
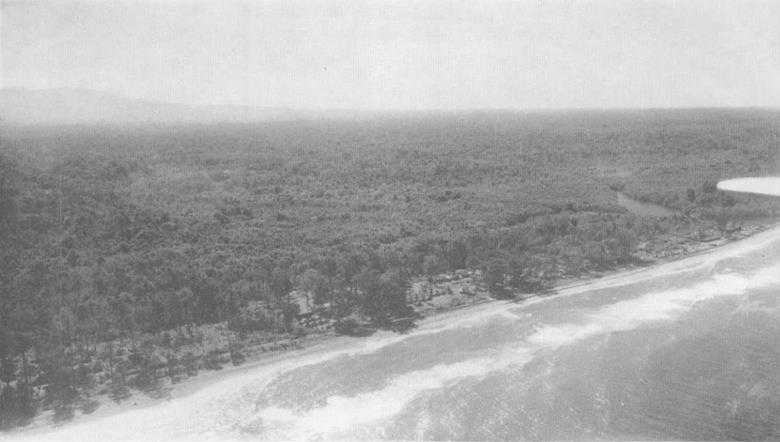
Japanese gardens in the Monoitu area. Bougainville, photographed from an aircraft of No. 5 Squadron, RAAF, April 1945. (RAAF)
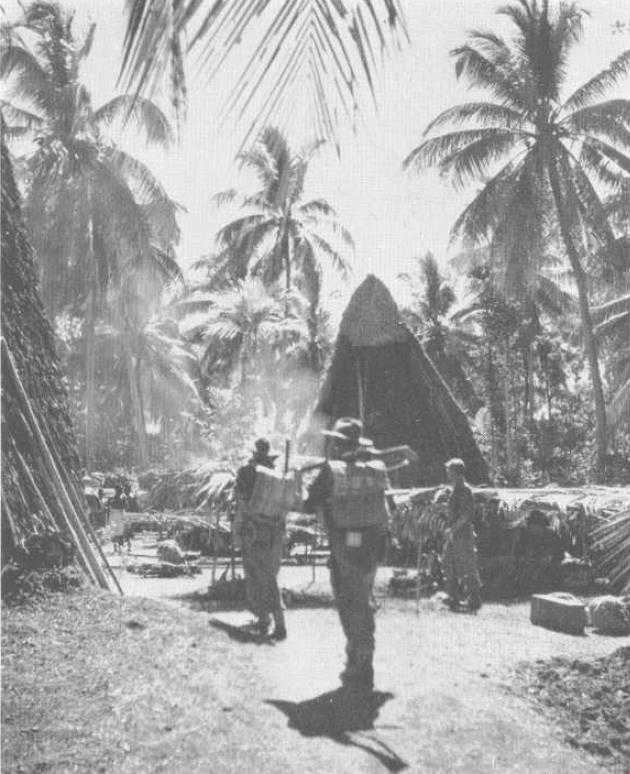
The headquarters of the 3rd Division and the divisional forward maintenance area, Toko, Bougainville. (Australian War Memorial)

Men of the 2nd Field Regiment disembarking from an LCT at Toko on 20th March 1945. Natives are helping with the unloading. (Australian War Memorial)

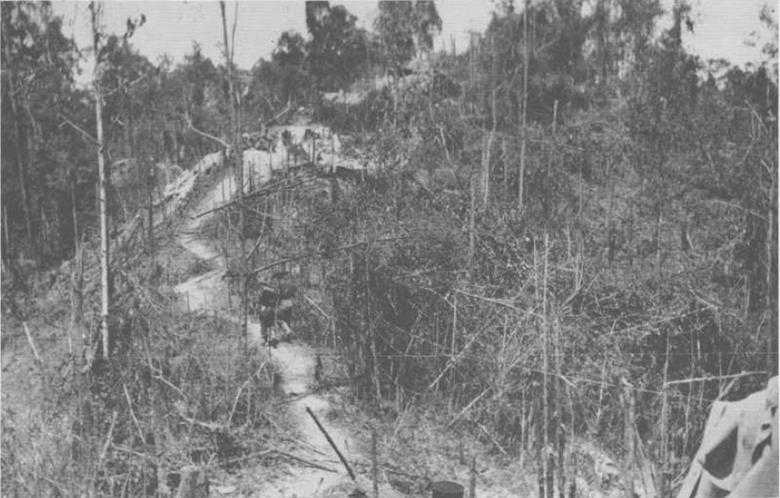
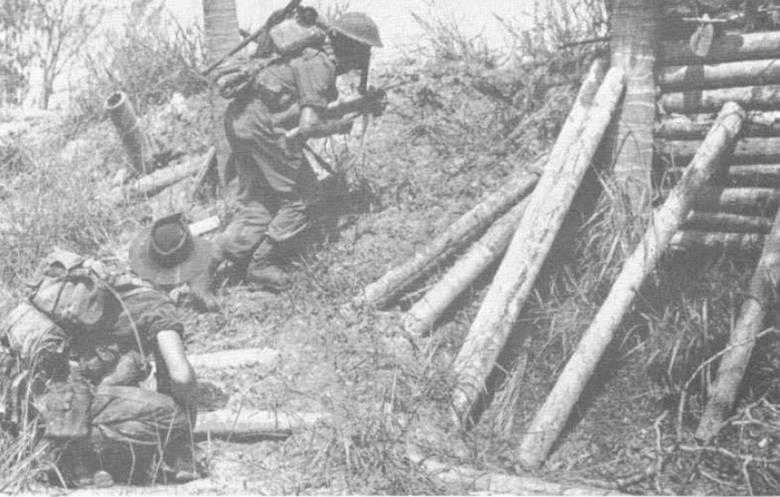
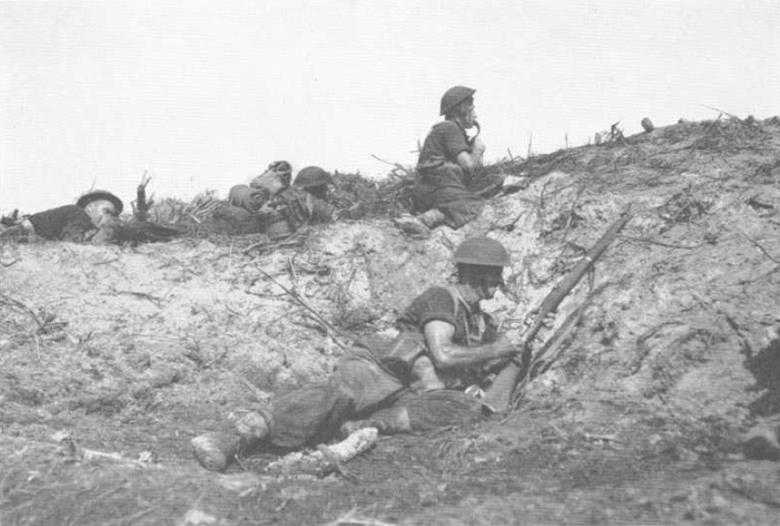
A patrol of the 24th Battalion moving through bamboo in search of Japanese who raided a battery of the 2nd Field Regiment east of Toko on 28th March 1945. (Australian War Memorial)
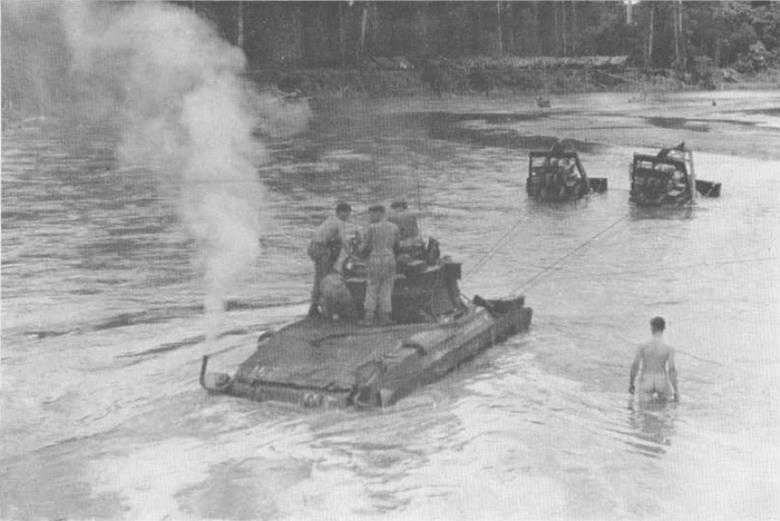
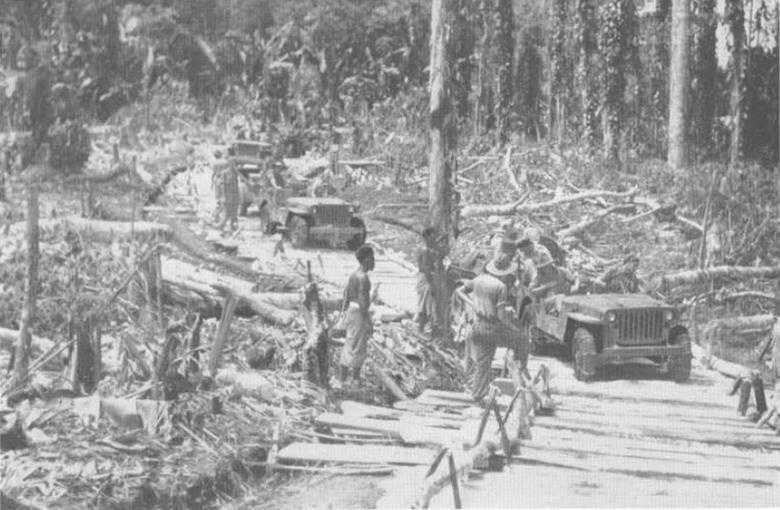
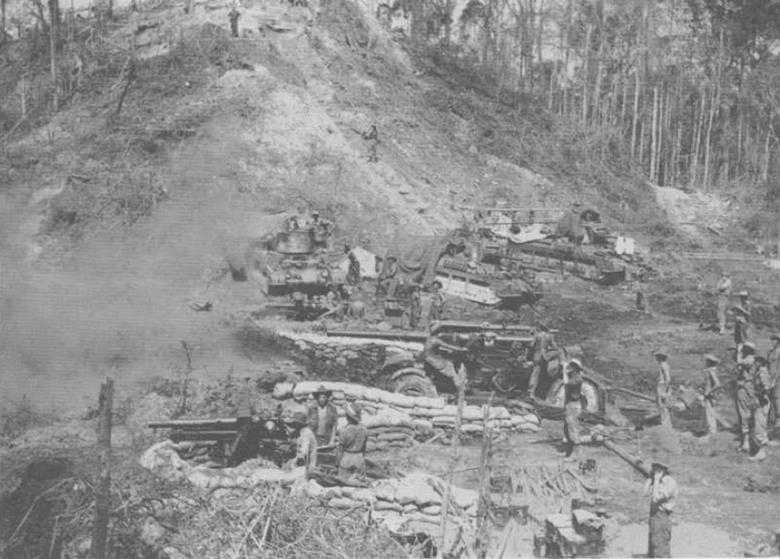
Bulldozers towing a tank of the 2/4th Armoured Regiment through the Puriata River on 30th March. Tanks were hurried forward to support the 25th Battalion at Slater’s Knoll. (Australian War Memorial)
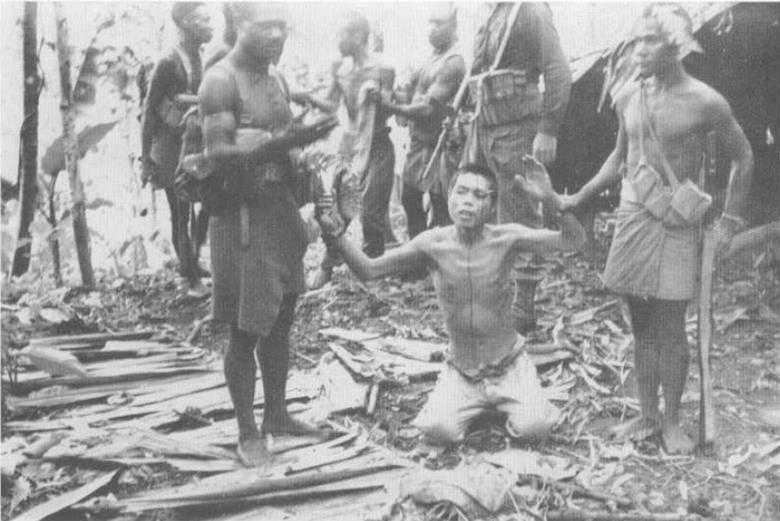
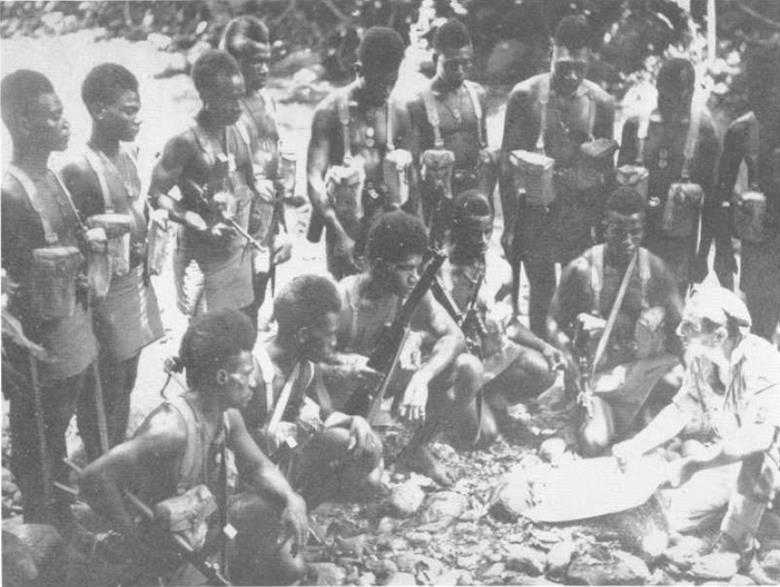
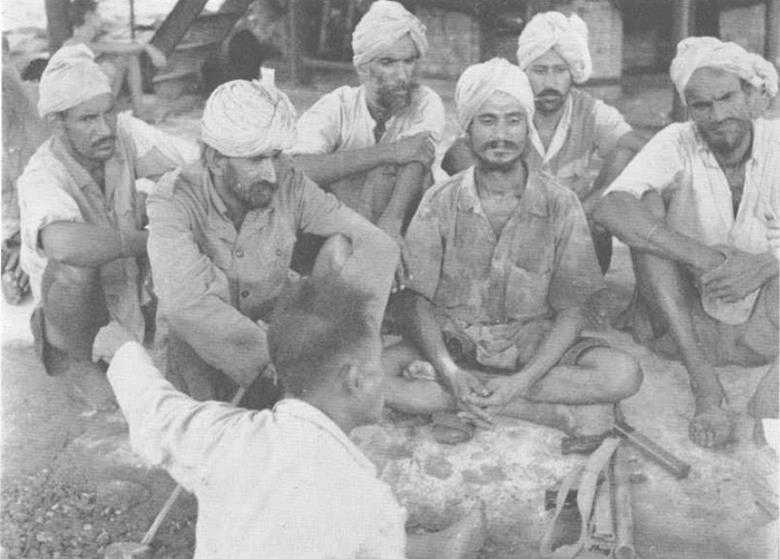
I loops of the New Guinea Infantry Battalion, attached to the 7th Brigade, with Japanese prisoners taken during a raid in the Barara area. Bougainville. on 23rd March 1945. (Australian War Memorial)
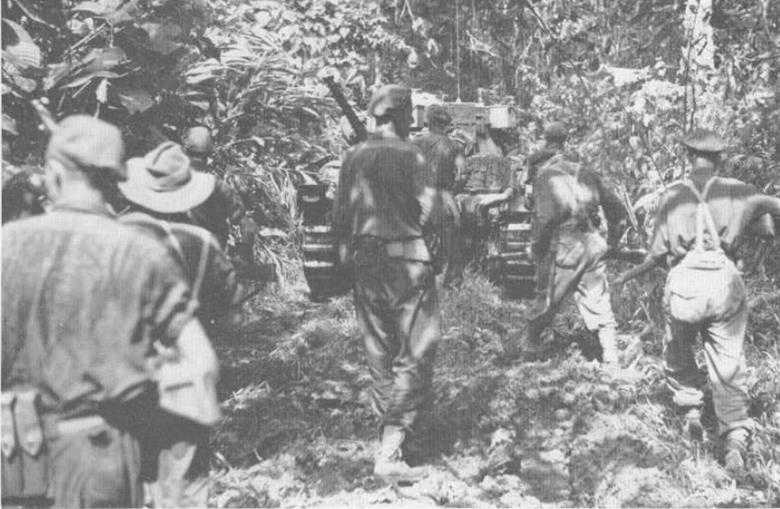
Troops of the 24th Battalion advancing with a tank along the Buin Road . Bougainville, toward Hiru Hiru on 26th April 1945 . (Australian War Memorial)

A tractor train moving along the Buin Road with supplies for the forward companies of the 24th Battalion, 26th April 1945. (Australian War Memorial)
A company of the 26th Battalion landed from barges on Torokori island, off the north-west coast of Bougainville, on 6th May 1945. (Australian War Memorial)
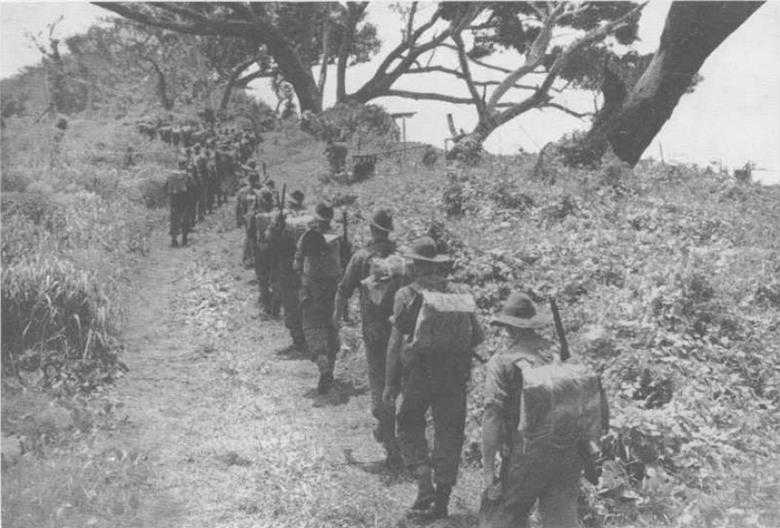
Corduroyed road serving the 31st/51st Battalion in the Soraken area, northern Bougainville, 7th June 1945. (Australian War Memorial)

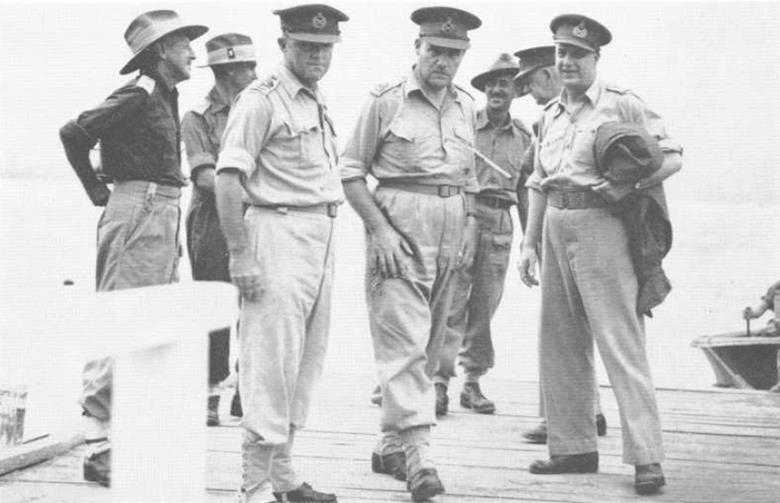
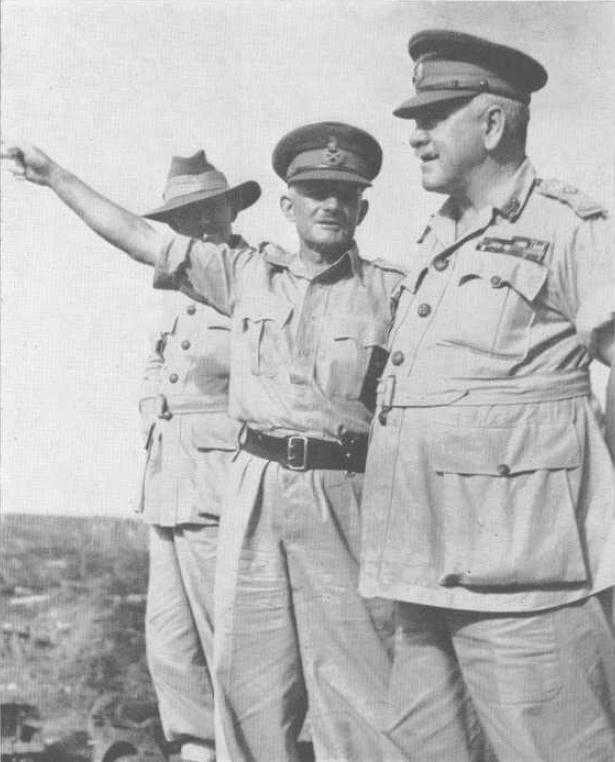
Lieut-General V. A. H. Sturdee (GOC First Army), Brigadier H. H. Hammer (commander of the 15th Brigade), Major-General W. Bridgeford I GOC 3rd Division) and Lieut-General S. G. Savige (GOC II Corps) at the Puriata River, Bougainville. 12th May 1945. (Australian War Memorial)

The Ruin Road at the Hongorai River, 28th July 1945. (RAAF)
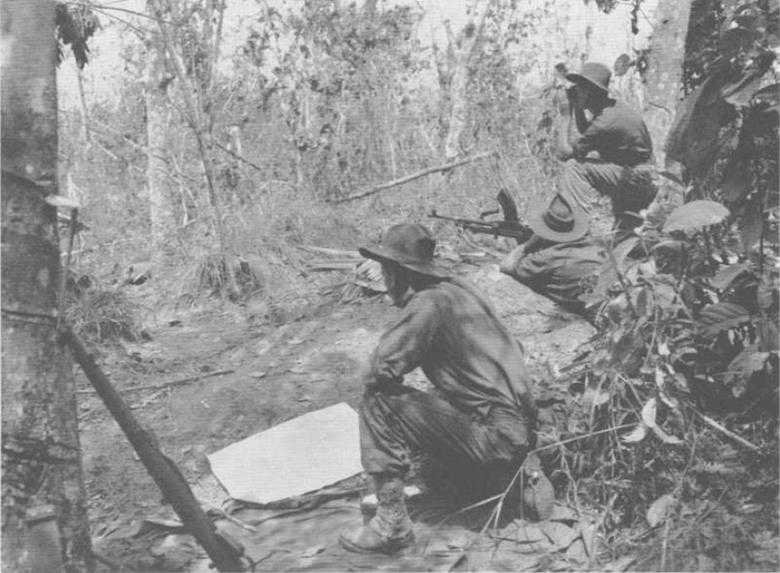
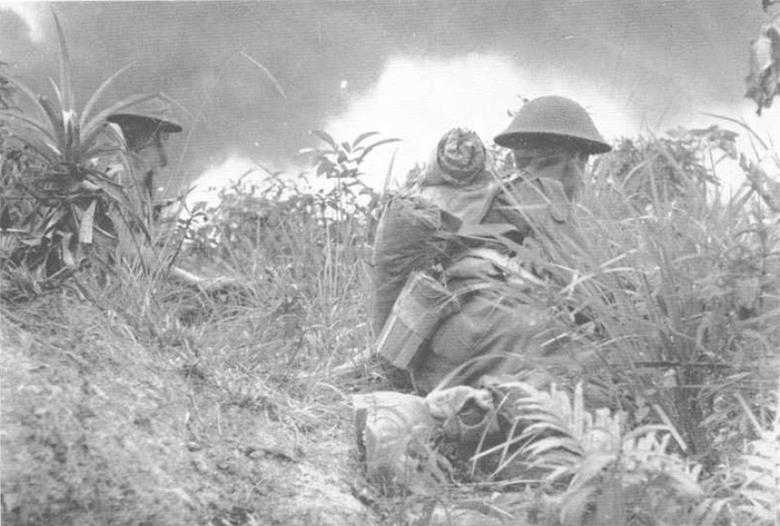
Troops of the 2/8th Commando Squadron in the Musaraka area. Bougainville, 7th June 1945. Patrols arc preparing to move out to attack enemy positions along the Ruin Road. (Australian War Memorial)
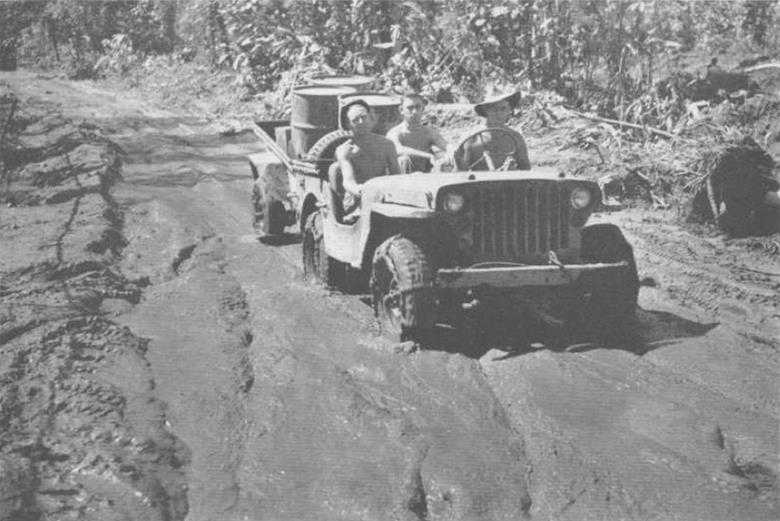
A section of the Bain Road, 16th July 1945. The corduroy has been submerged in mud. The jeep and trailer of the 2/11th Field Regiment are carrying water from the Ogorata River. (Australian War Memorial)
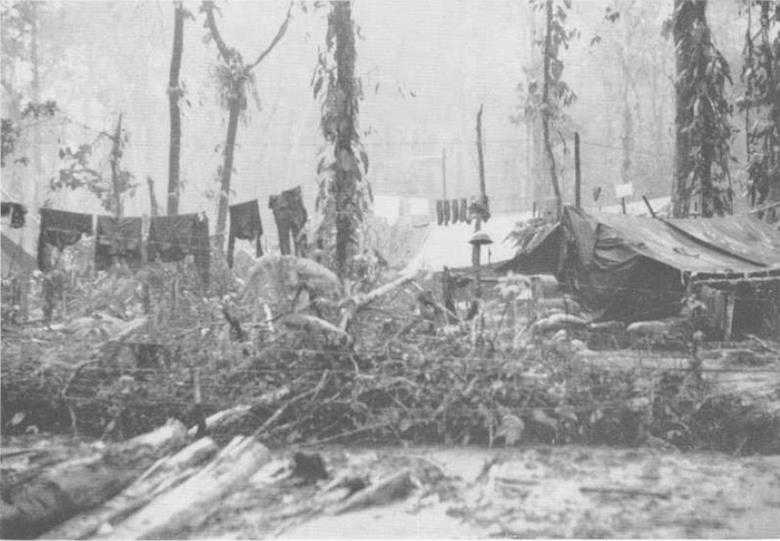
A sodden camp of the 47th Battalion in southern Bougainville on 20th July 1945. Weeks of torrential rain have brought operations almost to a standstill. (Australian War Memorial)

First contact between Major Otsu, the Japanese peace envoy, and Australian troops on the bank of the Mivo River, Bougainville, on 18th August 1945. Otsu (left) is accompanied by Superior Private Takeshita, carrying the flags. (Australian War Memorial)
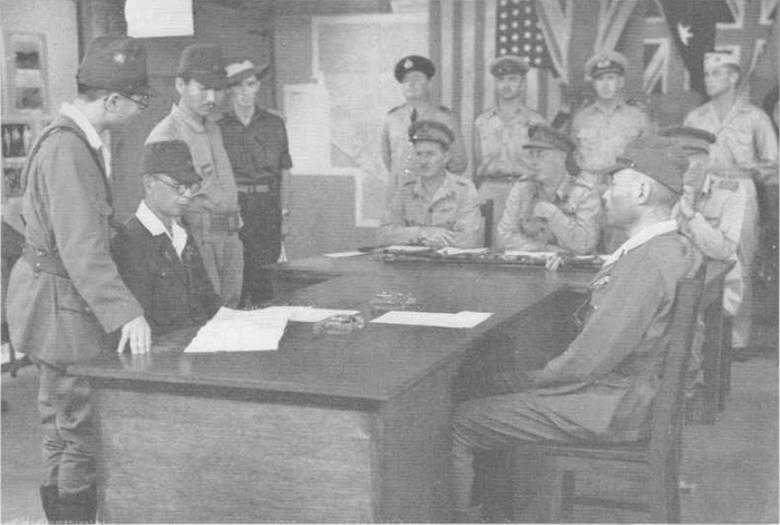
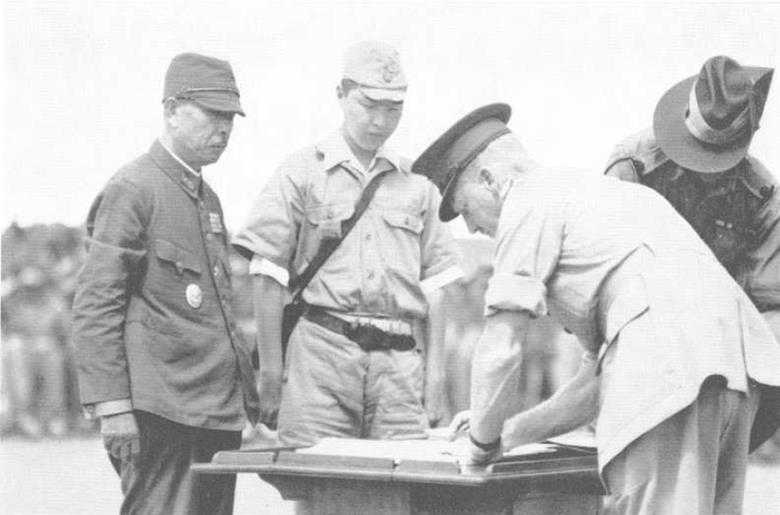
Lieut-General Kanda. commanding the XVII Japanese Army (seated left) surrenders to General Savige (GOC II Australian Corps) at Torokina. Bougainville, on 8th September 1945. Vice-Admiral Baron Samejima sits facing Kanda, who is flanked by two interpreters. Brigadier A. R. Garrett (BGS II Corps) is seated on Savige’s right. (RNZAF)

Japanese artillery assembled in southern Bougainville after the surrender. (RNZAF)
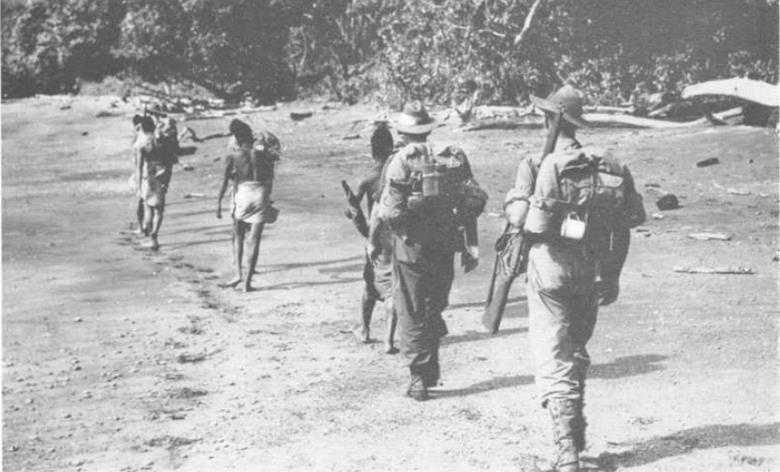
New Britain. 7th February 1945. Sergeant D. E. Sloan of the 1st New Guinea Infantry Battalion giving instructions to a patrol. (Australian War Memorial)
A patrol moving along the beach in the Jacquinot Bay area, New Britain. (Australian War Memorial)
At Jacquinot Bay, New Britain. 9th February 1945. In the foreground, from the left. Major-General A. H. Ramsay (GOC 5th Division), Lieut-General .1. Northcott (Chief of the General Staff), Major-General C. S. Steele (Engineer-in-Chief). Behind them, from the left, are: Lieut-Colonel W. T. Briggs (CRE 5th Division), Lieut-Colonel W. B. Maguire GSO1 5th Division). Lieut-Colonel E. A. Griffin (AA&QMG 5th Division) and Major-General J. H. Carman (Quartermaster-General). (Australian War Memorial)
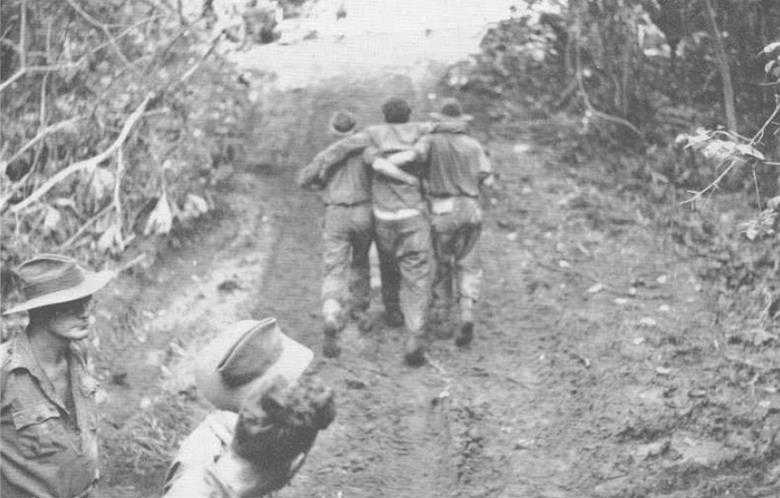
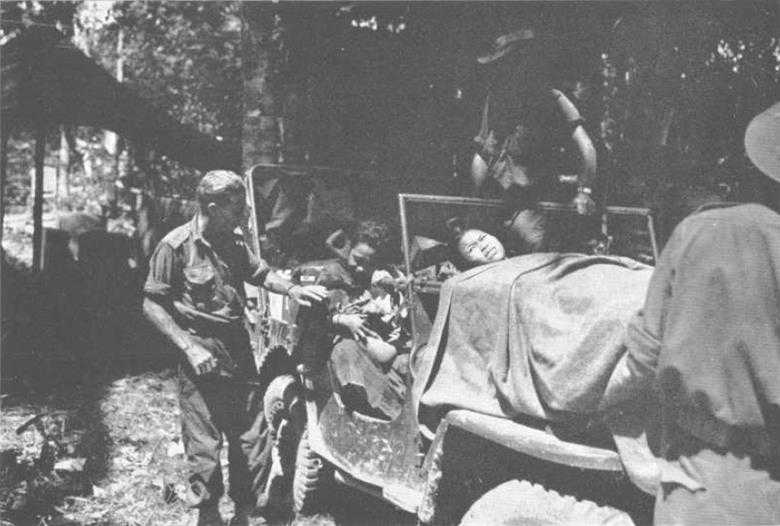
At Waitavalo, 16th March 1945. during the attack on Bacon Hill. A wounded man of the 14th/32nd Battalion being helped to the beach. (Australian War Memorial)
A platoon of the 2/11th Battalion advancing eastward from the Danmap River. Aitape area, 31st December 1944. (Australian War Memorial)
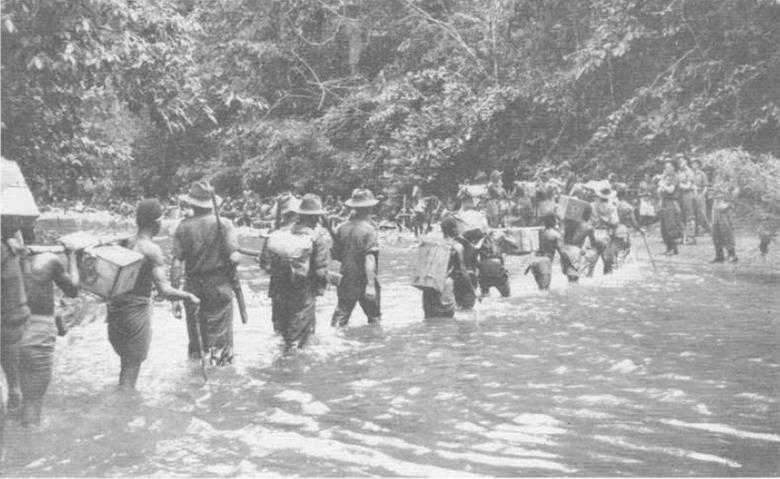
Men of the leading company of the 2/11th Battalion crossing the Wakip River, 2nd January 1945. (Australian War Memorial)
Men of the 2/11th Battalion in an action against Japanese positions east of Matapau, 2nd January 1945. (Australian War Memorial)
Men of the 2/11th Battalion in an action against Japanese positions east of Matapau, 2nd January 1945. (Australian War Memorial)
A company of the 2/2nd Battalion moving westward past Dagua on the way to the 1410 Feature, 25th March 1945. (Australian War Memorial)
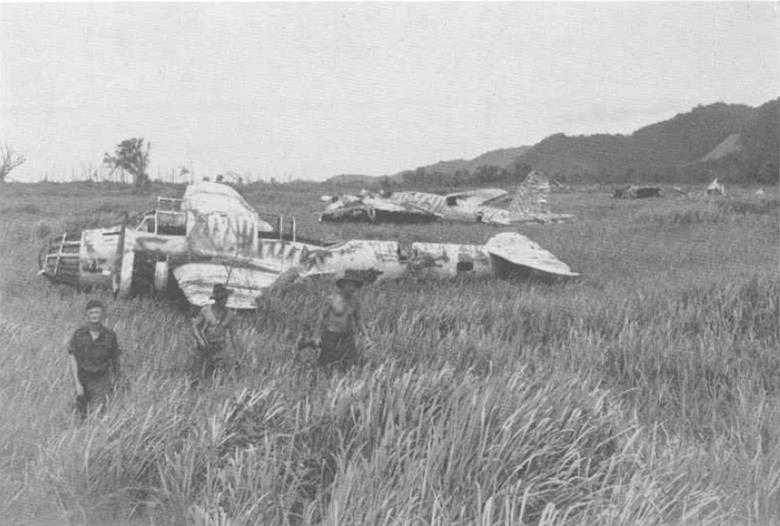
Dagua airfield, New Guinea, on 25th March, four days after it was occupied by the 2/2nd Battalion. (Australian War Memorial)

Stretcher bearers of the 2/2nd Battalion clambering up the 1410 Feature south of Dagua on the way to the forward company, 27th March 1945. (Australian War Memorial)
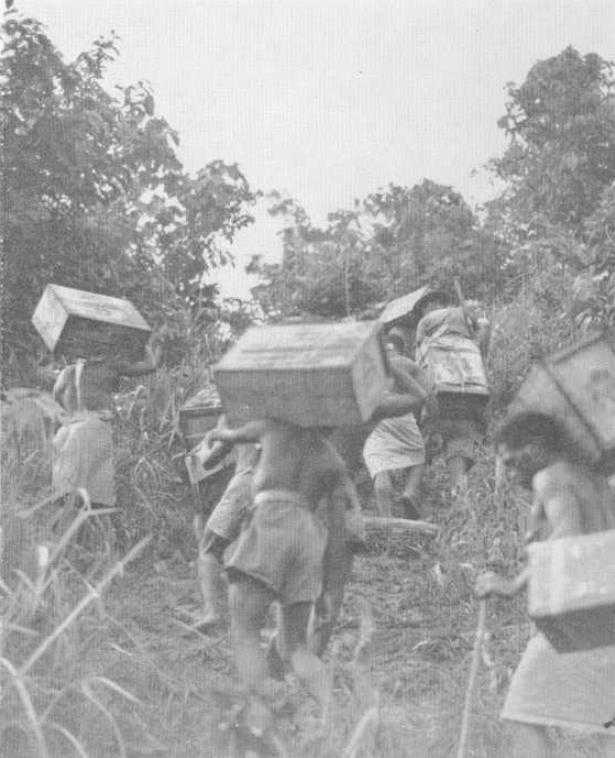
Native carriers climbing into the mountains south of Dagua with supplies for the forward troops of the 16th Brigade, 4th April 1945. (Australian War Memorial)
A carrier line, with an infantry escort, taking supplies to the 2/3rd Battalion in the Wonginara Mission area. 4th April 1945. (Australian War Memorial)
Major-General J. E. S. Stevens (GOC 6th Division) and Lieut-Colonel J. A. Bishop (temporarily commanding the 19th Brigade) with the 2/8th Battalion on Mount Shiburangu, 29th June 1945. (Australian War Memorial)
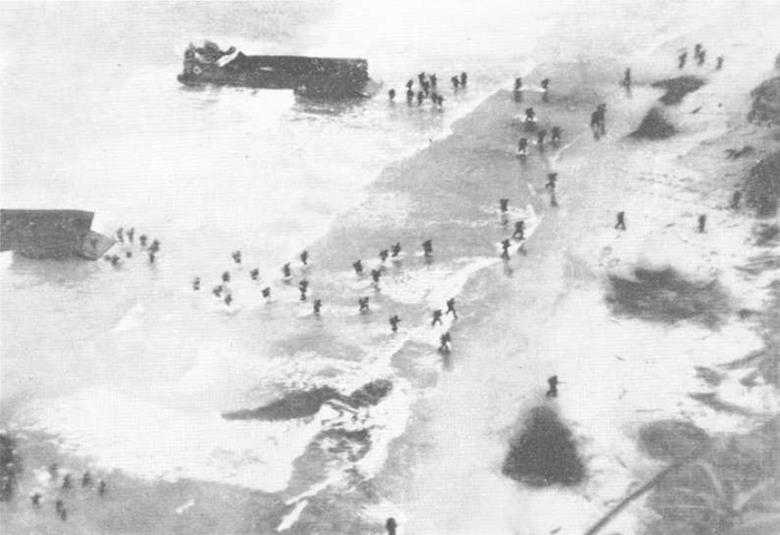
Part of “Farida Force” landing east of Wewak on 11th May 1945. (Australian War Memorial)
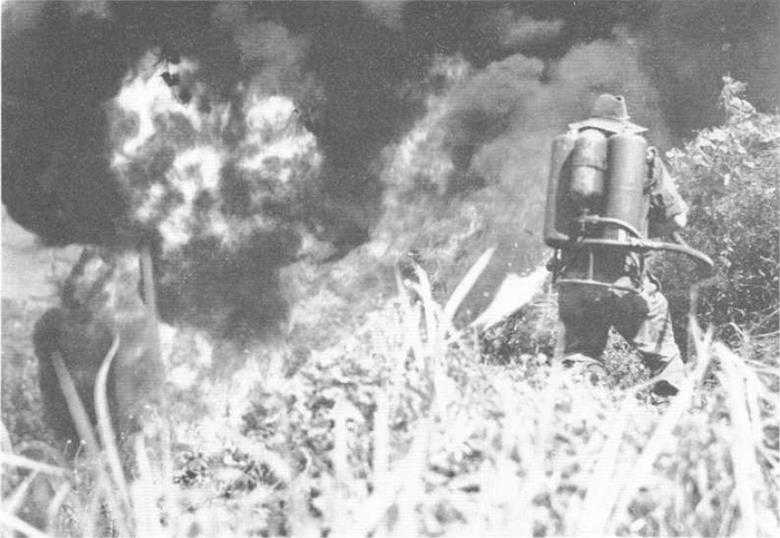
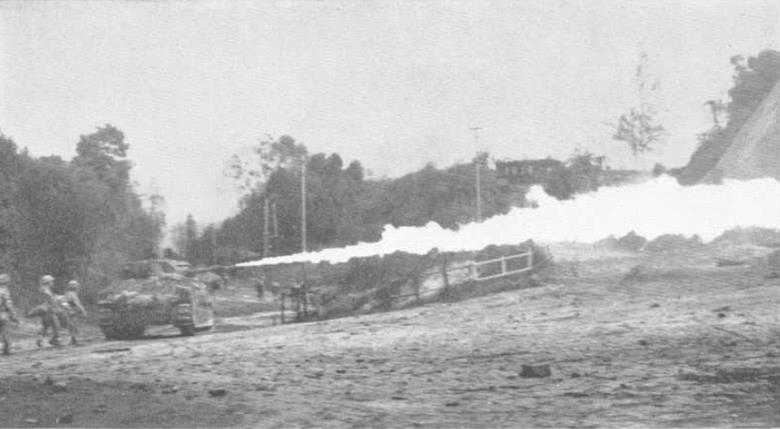
A private of the 2/8th Battalion using a flame-thrower against Japanese positions at Wewak Point. 10th May, 1945. (Australian War Memorial)
A weapon-pit of the 2/5th Battalion on Kunai Spur in the Torricellis, 10th July 1945. (Australian War Memorial )
Carriers climbing Mount Shihurangu on 12th July to take supplies to the 2/8th Battalion for their attack on The Blot. (Australian War Memorial )
The Blot on 14th July . the day of its capture by a company of the 2/8th Battalion . During the assault it was hit by 3,500 shells and hundreds of mortar bombs. (Australian War Memorial )
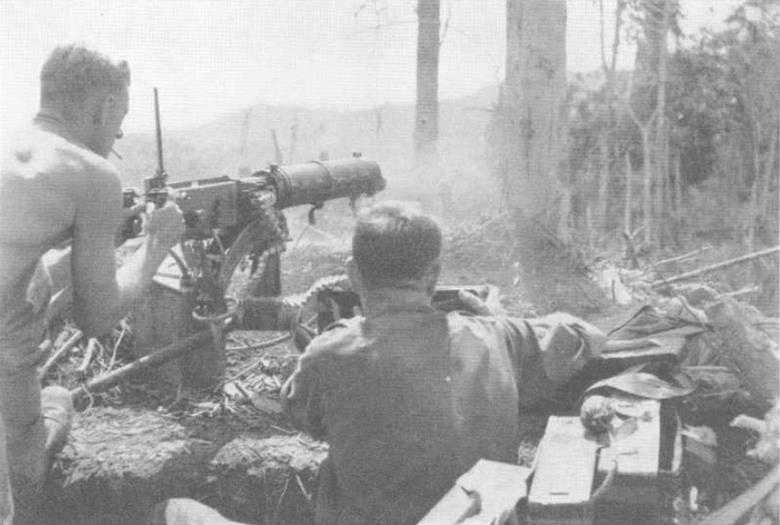
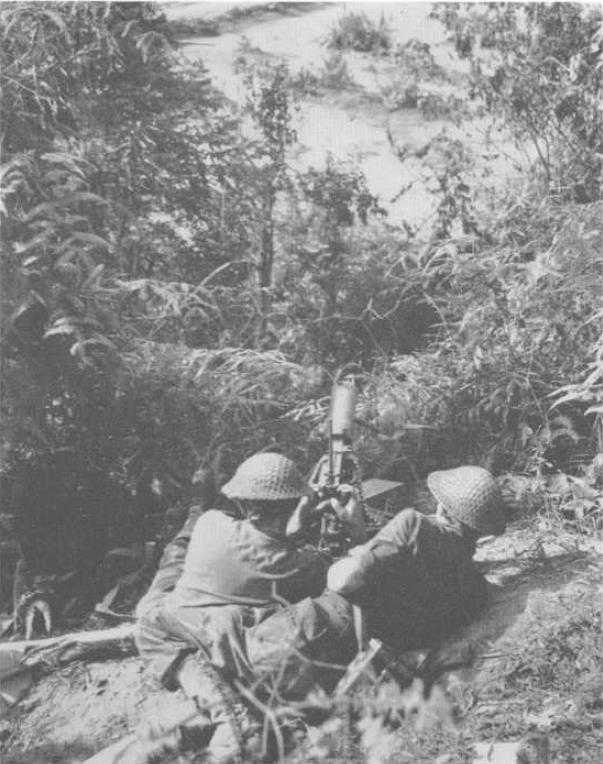
A Vickers machine-gun crew supporting the 2/6th Battalion during its successful attack on Ulunkohoitu Ridge in the Prince Alexander Ranges on 18th July 1945. (Australian War Memorial )
Troops of the 2/7th Battalion, on their long flanking march to Kiarivu, pass a House Tamboran (native meeting house) in Sigma on 5th August 1945. (Australian War Memorial)

Weary troops of the 2/7th Battalion resting on a muddy section of the track on the way to Kiarivu. (Australian War Memorial)

Kiarivu. 6th August 1945. A “kai bomber” drops food for the newly-arrived troops. (Australian War Memorial)
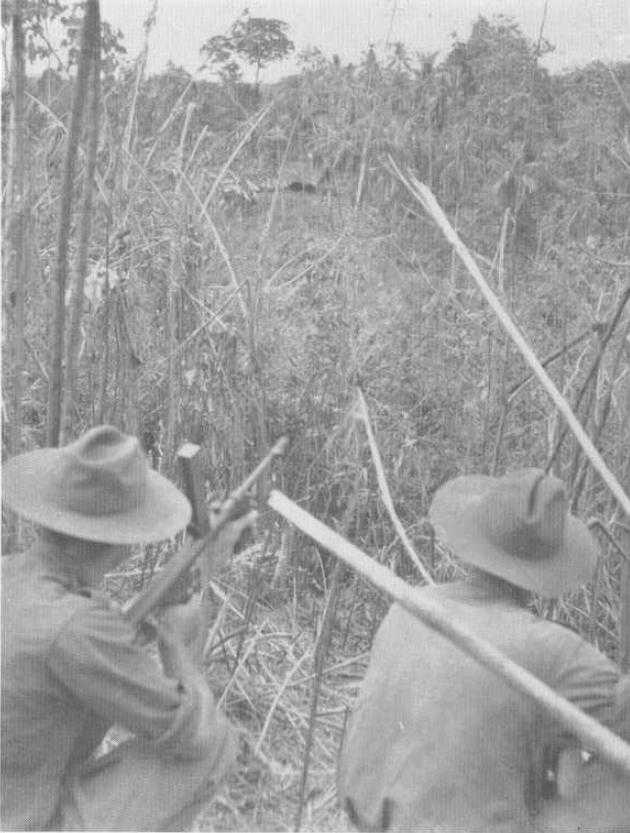
Men of the 2/7th Battalion watching for signs of Japanese movement in Kiarivu village. (Australian War Memorial)
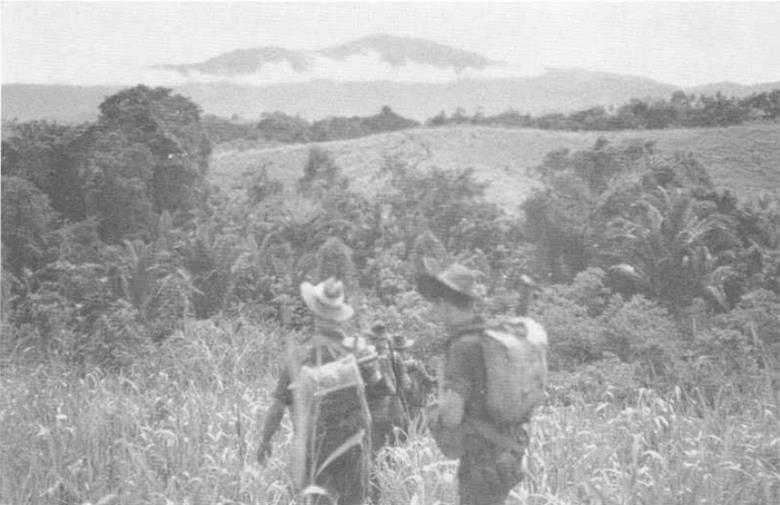
At Kiarivu. 6th August. In the distance is Mount Turu. The 2/7th Battalion was then on the edge of the area in which the MU Japanese Army intended to make its last stand. (Australian War Memorial )
Major-General H. C. H. Robertson (GOC 6th Division) taking the surrender of Lieut-General Adachi, commander of the XVIII Japanese Army. at Cape Wom near Wewak. 13th September 1945. (Australian War Memorial )
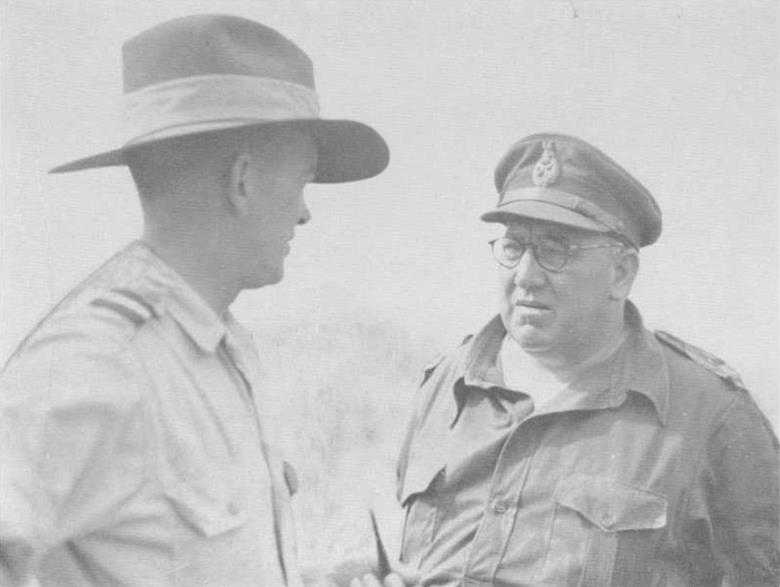
Brigadier D. A. Whitehead (Commander of the 26th Brigade). Lieut-General Sir Leslie Morshead (GOC 1 Corps) and Lieut-Colonel S. J. Douglas (CO 2/11th Field Ambulance) on Tarakan Island, 4th May 1945. (Australian War Memorial)

View from the mast of LST 637 as she leaves Morotai on 27th April 1945 carrying troops of the 26th Brigade for the assault on Tarakan. (Australian War Memorial)
Engineers of the 2/13th Field Company demolishing underwater obstacles. Tarakan. 30th April 1945. (Australian War Memorial)
Some engineers of the 2/13th Field Company on the pipeline jetty, Tarakan, on 30th April 1945 after having breached underwater obstacles in preparation for the assault. From left; Sappers R. A. R. Stevenson and P. Carroll, Lance-Corporal R. C. Mace. Sappers J. S. Proctor, G. E. Maxwell. A. J. McD. Clydesdale and E. S. Slee. Mace later was awarded the Military Medal and, in 1952. the British Empire Medal. Slee was killed on Tarakan on 1st July 1943. (Australian War Memorial)
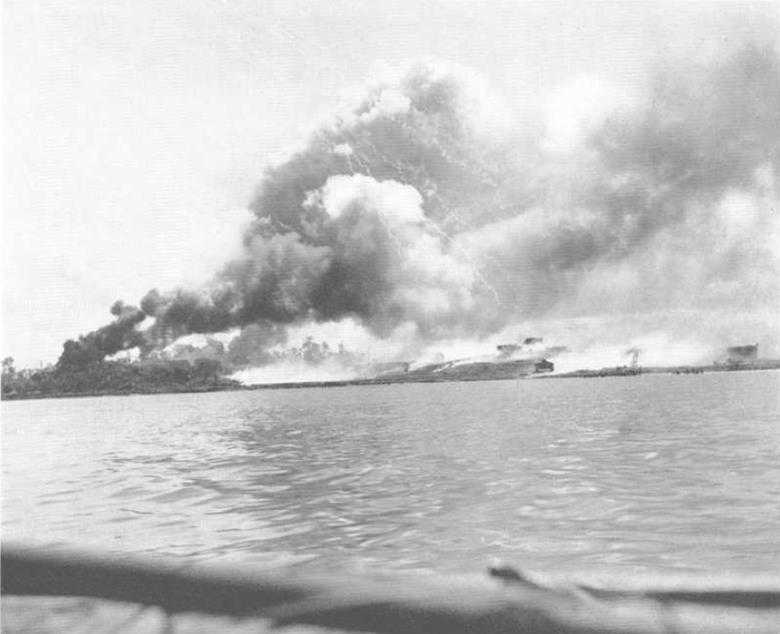
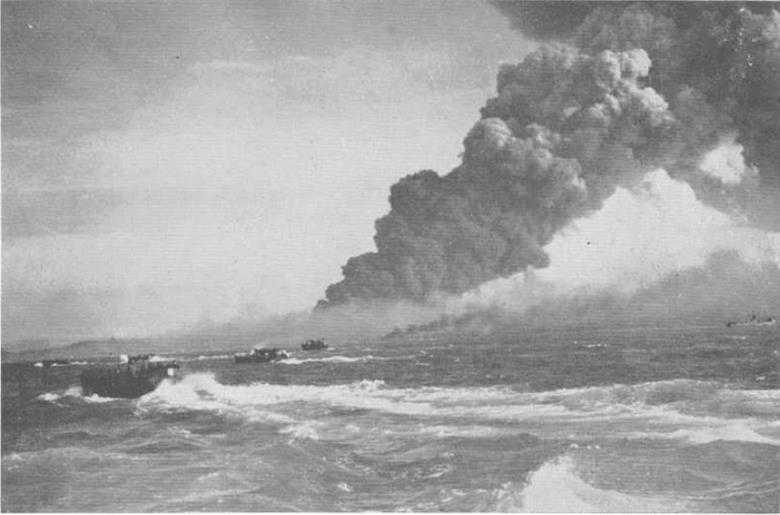
The bombardment of Tarakan. 1st May 1945.
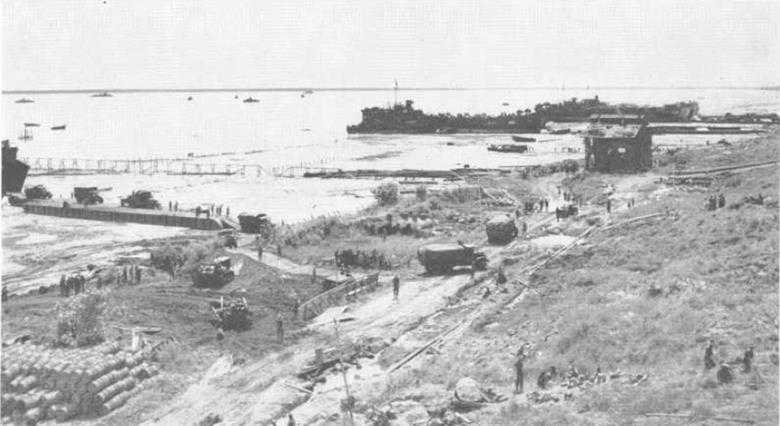
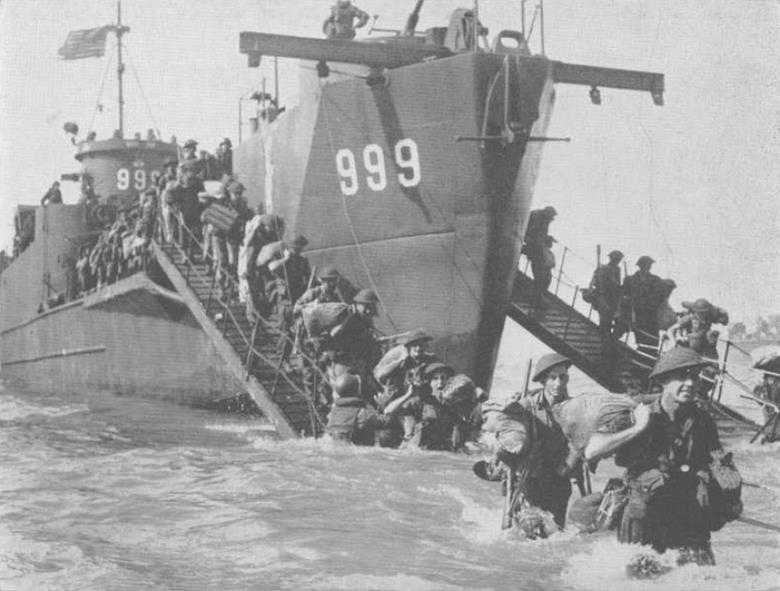
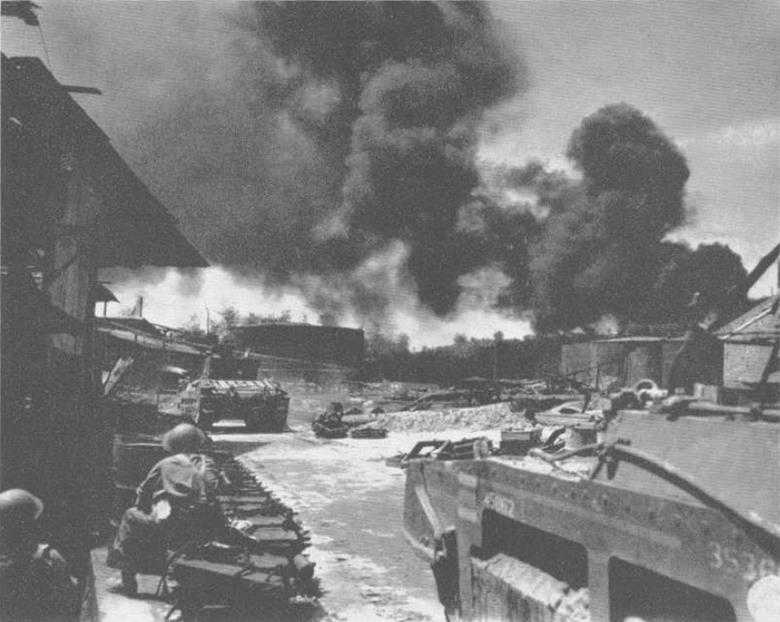
Tarakan. 1st May. LSTs beached, pontoons erected and unloading in progress.
A machine-gun crew of the 2/23rd Battalion firing at a Japanese position across the Glenelg Highway, Tarakan. on 1st May. (Australian War Memorial)

Tarakan, 1st May. Stretcher bearers of the 2/23rd Battalion bringing out a wounded man. The stretcher party is passing an oil storage tank. (Australian War Memorial)

Red Beach. Tarakan, on the day of the landing (Australian War Memorial)

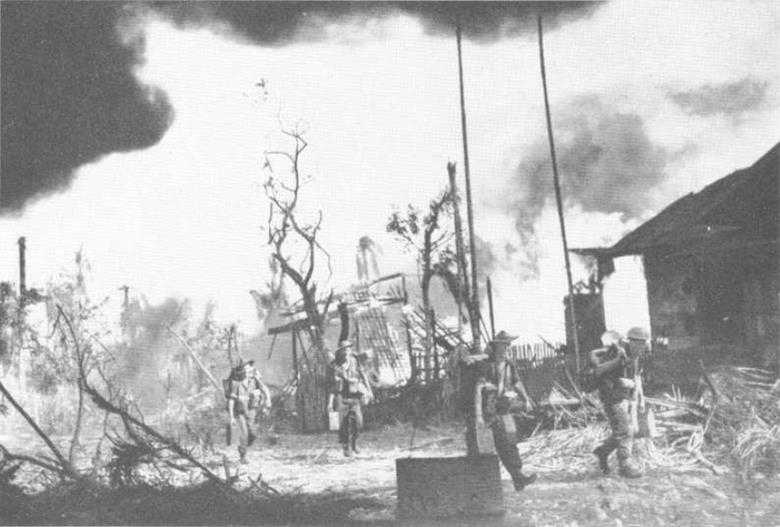
Tarakan Island, 5th May 1945. Troops of the 2/24th Battalion approach a Japanese pill-box after it had been subdued by naval gunfire and a flame-thrower (Australian War Memorial)
Looking along the crest of Hill 105 on Tarakan Island, 29th May 1945 (Australian War Memorial)
“HMAS Margy” bombarding the Joyce feature. Tarakan, on lOth June 1945. In support of the 2/23rd Battalion were two 25-pounders, one 3.7-inch anti-aircraft gun and the guns of three tanks. On the barrel of the 25-pounder in the foreground is painted “Tel el Eisa Tilly” (Australian War Memorial)
Looking across Snags Track to the Elbow feature. Tarakan Island. 21st May 1945. (Australian War Memorial)
A patrol of the 2/24th Battalion moving out on 21st June to make contact with the 2/4th Commando Squadron after the capture of Hill 90. Tarakan, on the 20th. (Australian War Memorial)

Men of the 24th Brigade landing on Labuan Island from an LCI on 10th June 1945. (US Army Signal Corps)
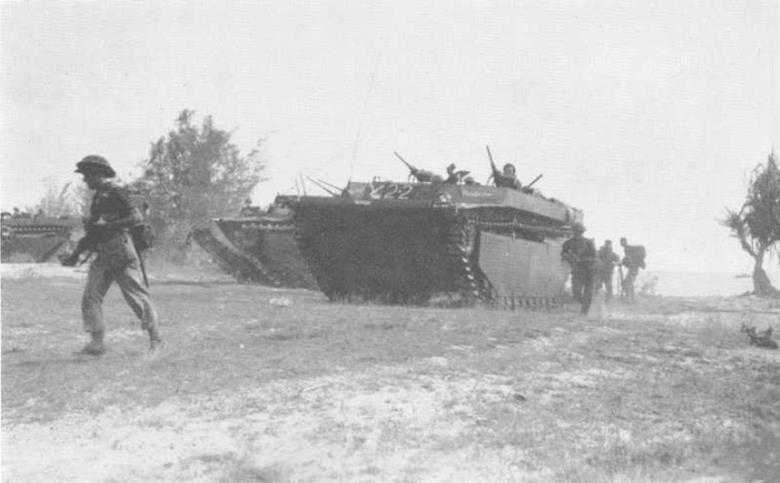
LVTs landing troops of the 20th Brigade Group on Muara Island on 10th June. (US Army Signal Corps)

Left to right: Lieut-Colonel M. R. Jeanes (CO 2/43rd Batialion), General MacArthur and General Morshend on Labuan Island, 10th June 1945, (Australian War Memorial)
Troops of the 2/43rd Battalion moving into a dispersal hay during the capture of Labuan airfield on 10th June. (Australian War Memorial)
Chinese girl wounded by a shell fragment near Labuan airfield being taken to hospital by a jeep ambulance. 13th June 1945. (US Army Signal Corps)
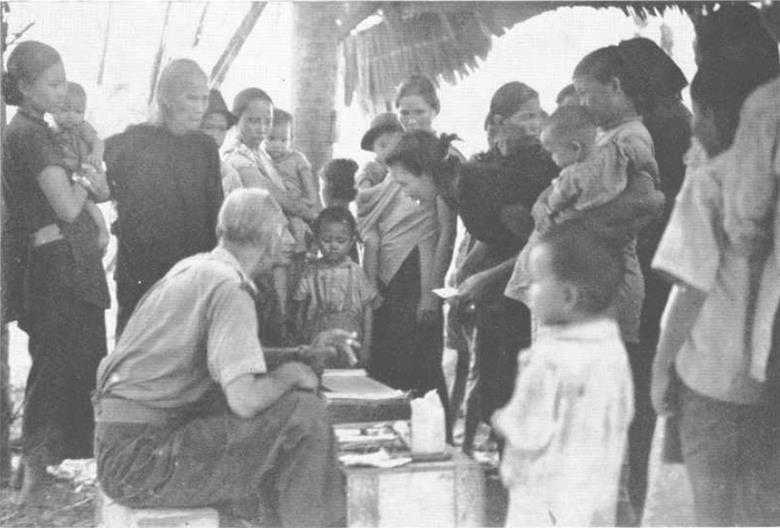
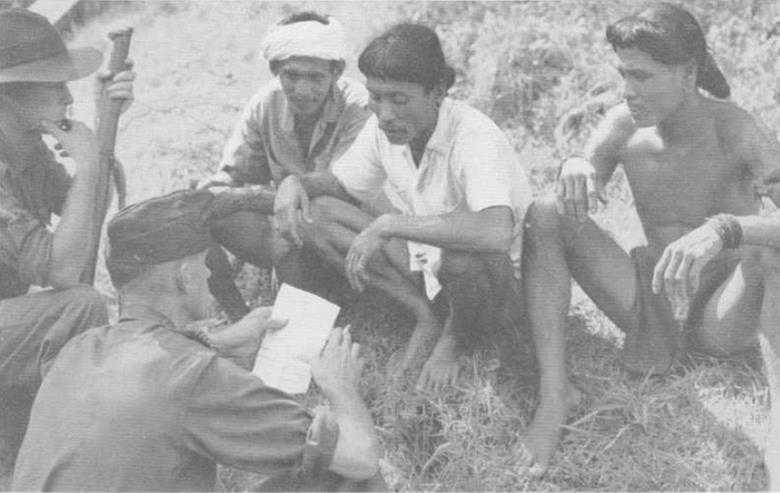
Labuan Island. 11th June. Major G. M. L. V. Gifford of the British Borneo Civil Affairs Unit questioning refugees at the headquarters of the 24th Brigade. (Australian War Memorial)
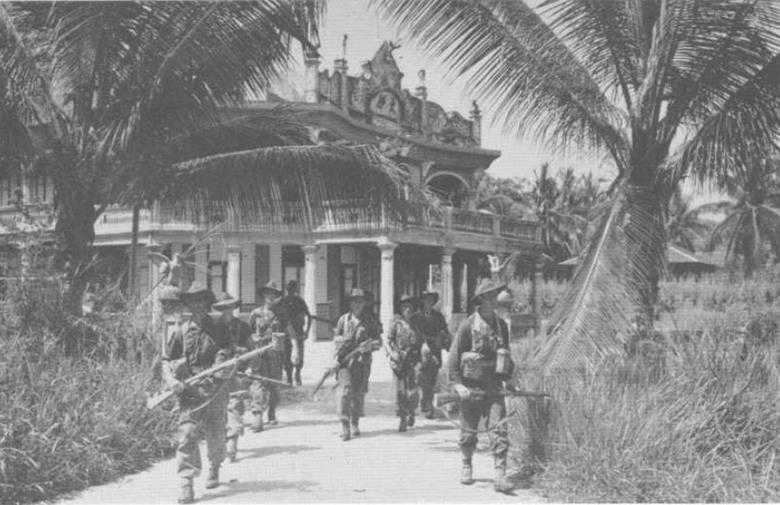
Troops of the 2/17th Battalion patrolling the town of Brunei. 13th June 1945. (US Army Signal Corps)
Bren gun position of the 2/43rd Battalion north of Labuan airfield, 13th June. (US Army Signal Corps)
Major-General G. F. Wootten (right), commanding the 9th Division, and Air Commodore F. R. W. Scherger, commanding First Tactical Air Force, RAAF, on Labuan Island, 14th June. 1945. (US Army Signal Corps)
Dyaks being questioned at 20th Brigade headquarters, Brunei, 16th June 1945. (Australian War Memorial)
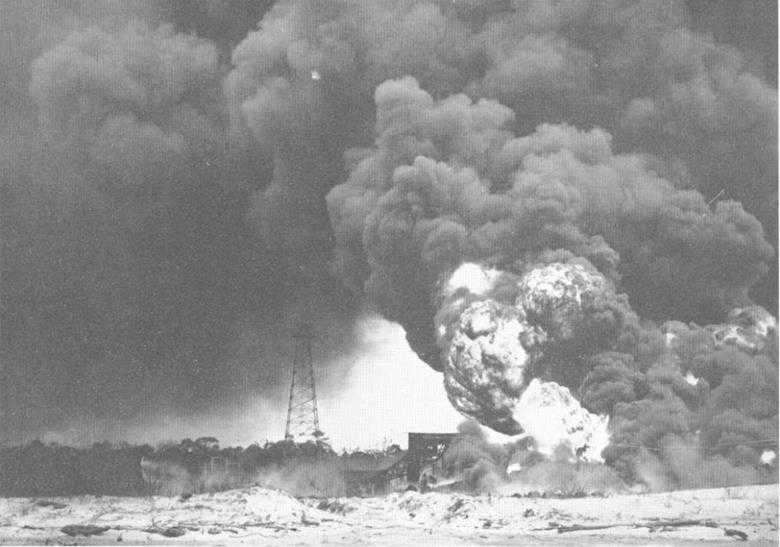
Burning oil wells al Seria. 28th Jane 1945. (Australian War Memorial)
Lutong, Borneo, 20th June. Indian troops released from captivity by the 2/13th Battalion. (Australian War Memorial)

A patrol of the 2/13th Battalion setting out from Miri, Borneo, 6th July 1945. (Australian War Memorial)
Landing craft carrying troops of the 7th Division to the assault on Balikpapan, 1st July 1945. (Australian War Memorial)
Men of the 2/ 14th Battalion landing from an LCI at Balikpapan on 1st July. (Australian War Memorial)

An LCVP landing troops at Balikpupan. 1st July. (Australian War Memorial)
Troops moving inland at Ralikpapan can 1st July. (Australian War Memorial)

A Matilda tank advancing through Milikpapan port. 3rd July. 1945. (US. Army Signal Corps)

A patrol of the 2/9th Battalion entering Penadjam village, on the west side of Balikpapan harbour. soon after landing there on 5th July. (US. Army Signal Corps)

Control tower at Manggar airfield, Balikpapan, whence Lieutenant G. M. Thorp of the 1st Naval Bombardment Group directed naval gunfire on to the Japanese stronghold on Waites’ Knoll. (Australian War Memorial)
On Parramatta feature. Balrkpapan, 13th August. From left: Lieut-General F. H. Berryman (Chief of Staff. Advanced Land Headquarters). Major-General E. J. Milford (GOC 7th Division) and General Sir Thomas Blamey. (Australian War Memorial)
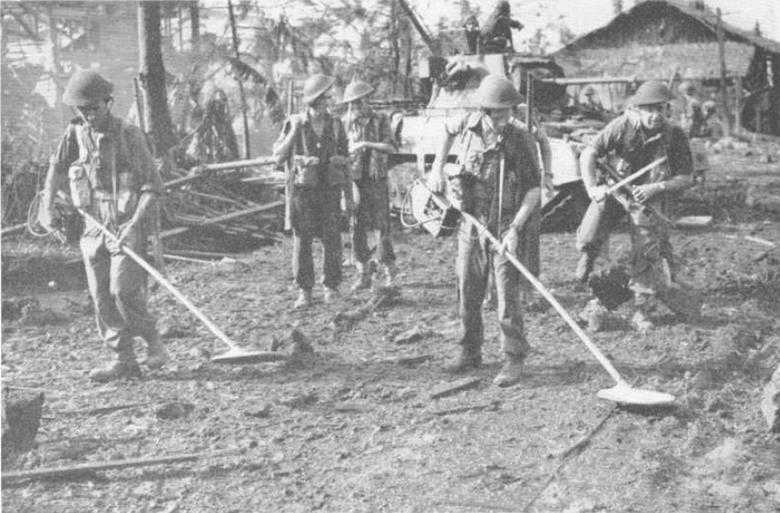
Sappers of the 2/9th Field Company searching for mines. Balikpapan, 1st July. (Australian War Memorial)
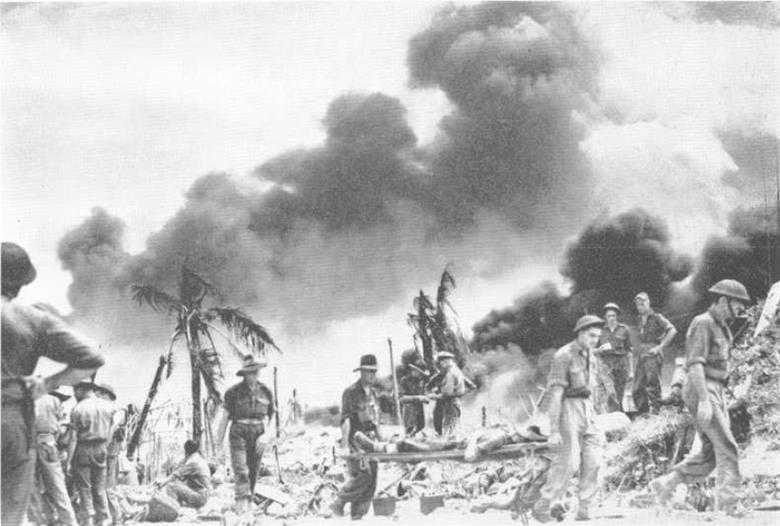
Stretcher bearers bringing in a wounded man. Balikpapan. 1st Jul. (Australian War Memorial)

A mortar crew of the 2/2nd Anti-Tank Regiment firing a 4.2 in support of the 2/10th Battalion advancing on Parramatta from a position near the Vasey Highway, Balikpapan, on 1st July. (Australian War Memorial)
Directing mortar fire on to Hill 87, Balikpapan. 1st July. (US Army Signal Corps)
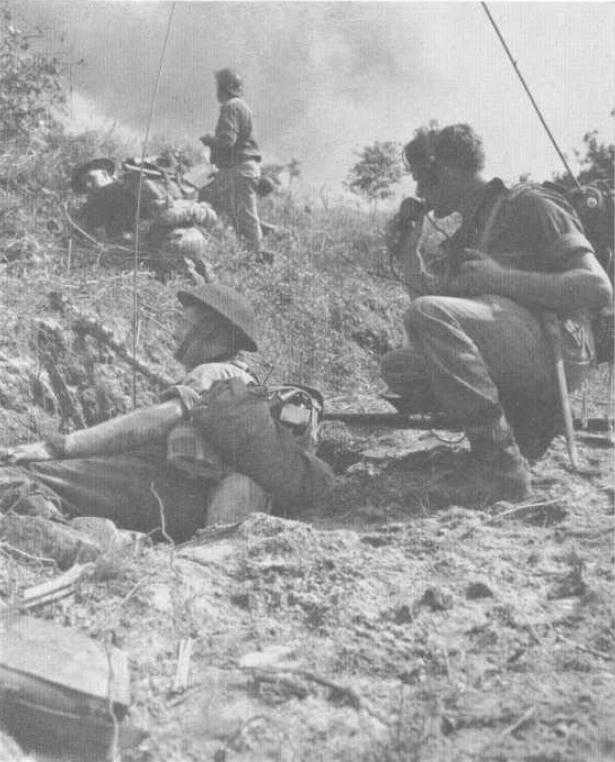
Infantry and artillery observers pinned down by Japanese fire from Hill 87, 1st July. (US Army Signal Corps)
Men of the 2/12th Battalion north-east of Balikpapan. 2nd July. (Australian War Memorial)
A flame-throwing tank of the 1st Armoured Regiment and men of the 2/10th Battalion attacking a Japanese hunker near the Tank Plateau. Balikpapan. 3rd July 1945. (Australian War Memorial)
Troops of the 2/ 10th Battalion, supported by tanks, clearing the oil refinery area, Balikpapan. 3rd July. (US Army Signal Corps)
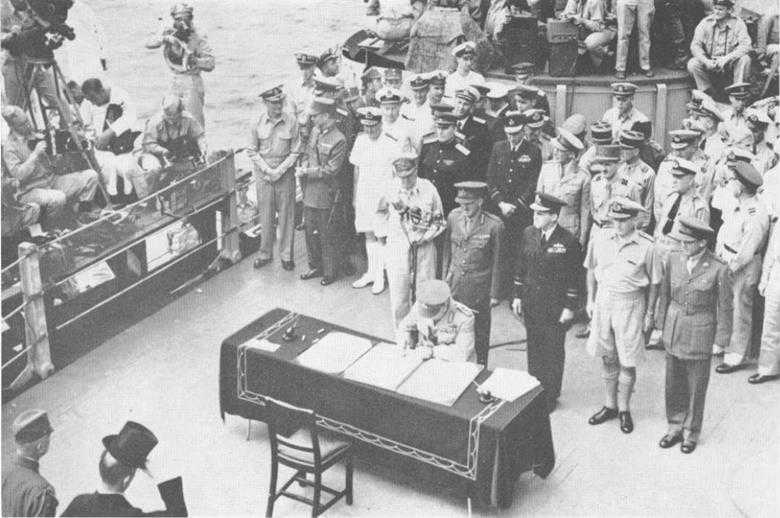
On USS Missouri. Tokyo Bay, 2nd September 1945. General Sir Thomas Blamey signs the surrender document on behalf of Australia. Immediately behind him, from left, are General MacArthur, Lieut-General F. H. Berryman, Air Vice-Marshal W. D. Rostock. Rear-Admiral G. D. Moore, Lieut-Colonel D. H. Dwyer. To the rear, from left, arc officers representing: the American Navy, China, Royal Navy, Russia, Australia, Canada, France and the Netherlands. (Australian War Memorial)
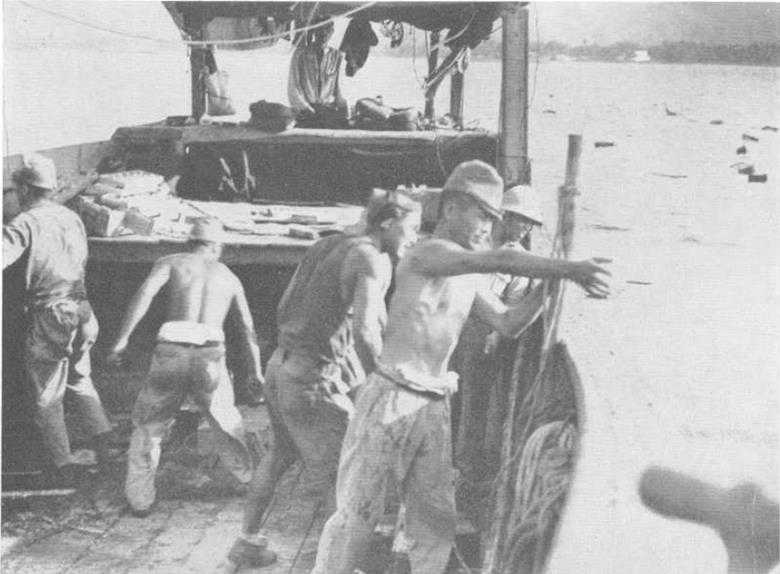
After the surrender: Japanese troops dumping ammunition in the sea off Dili, Portuguese Timor. 25th September 1945. (Australian War Memorial)
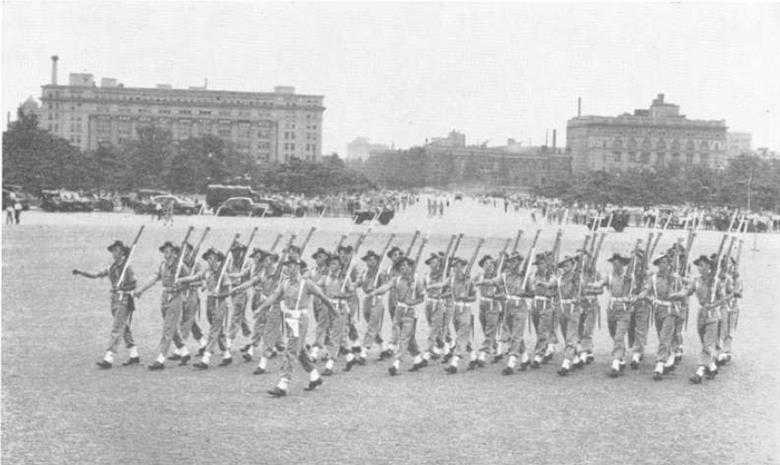
Tokyo. April 1947. New guard of the 65th Australian Infantry Battalion marching on to the grounds of the Imperial Palace to take over from the old guard. (Australian War Memorial)