Illustrations
All illustrations annotated (AWM) are credited to the Australian War Memorial.
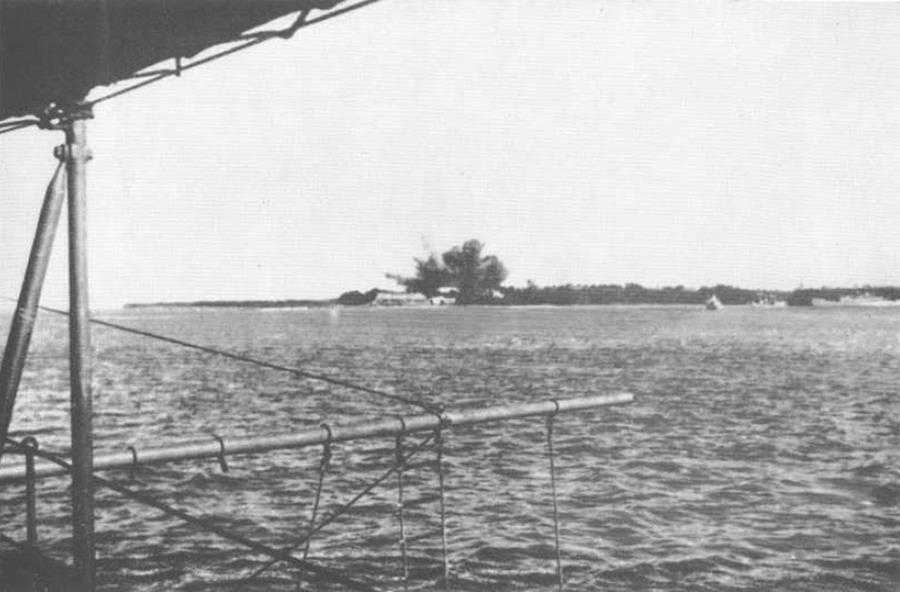
Darwin, 19th February 1942. Bombs fall on the Post Office during the first Japanese air attack on the Australian mainland. (AWM)
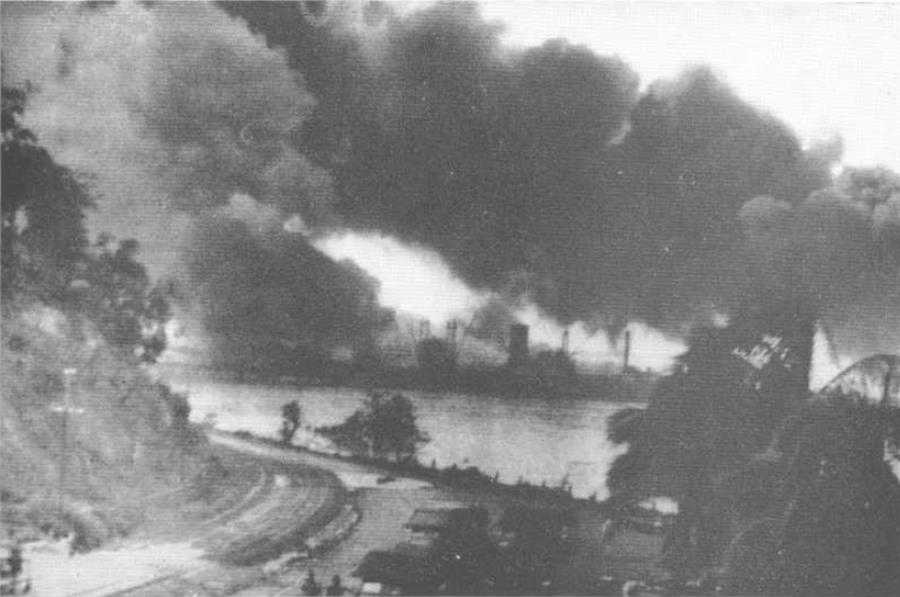
The Darwin jetty during the raid. The Australian ships Barossa and Neptuna are alongside (Cdr J. C. B. McManus, RAN)
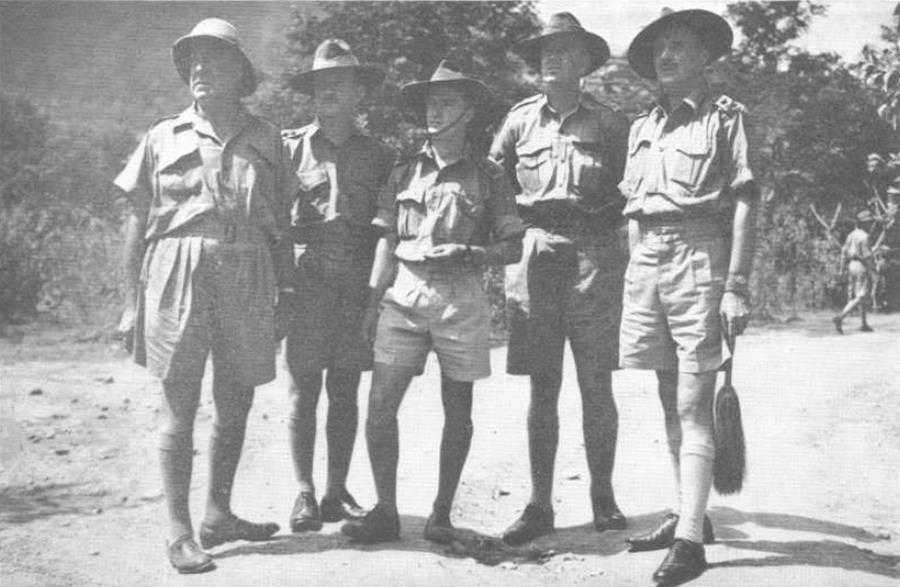
Major-General B. M. Morris, GOC New Guinea Force, and some of his staff, at Port Moresby. July 1942. Left to right: Lieut-Colonel E. T. Brennan, ADMS; Lieut-Colonel D. D. Pitt, GSO I; Lieutenant A. B. Luetchford, ADC to General Morris; Lieut-Colonel E. B. Serisier. AA&QMG; and General Morris. (AWM)

Port Moresby, 1942 (AWM)
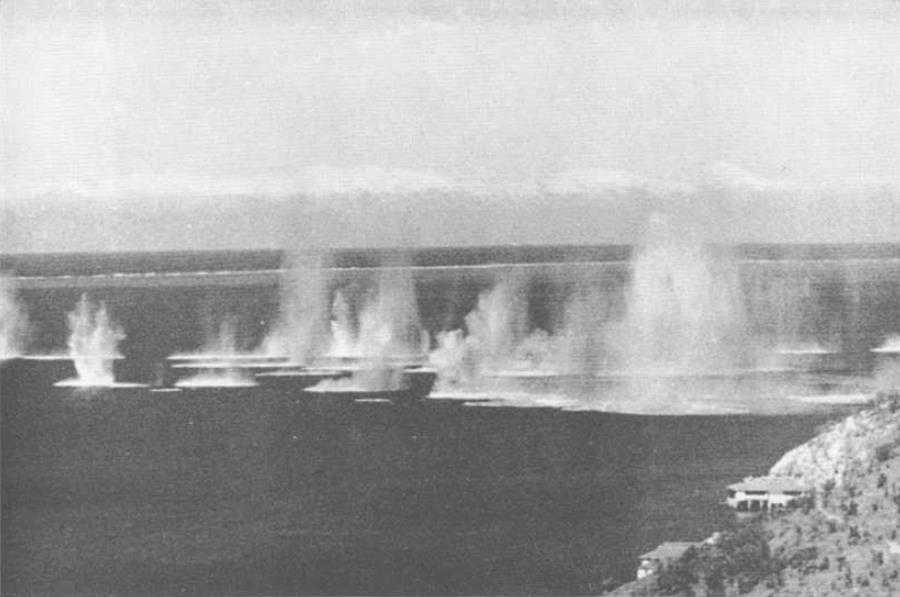
Japanese bombs burst along the Port Moresby waterfront (AWM)
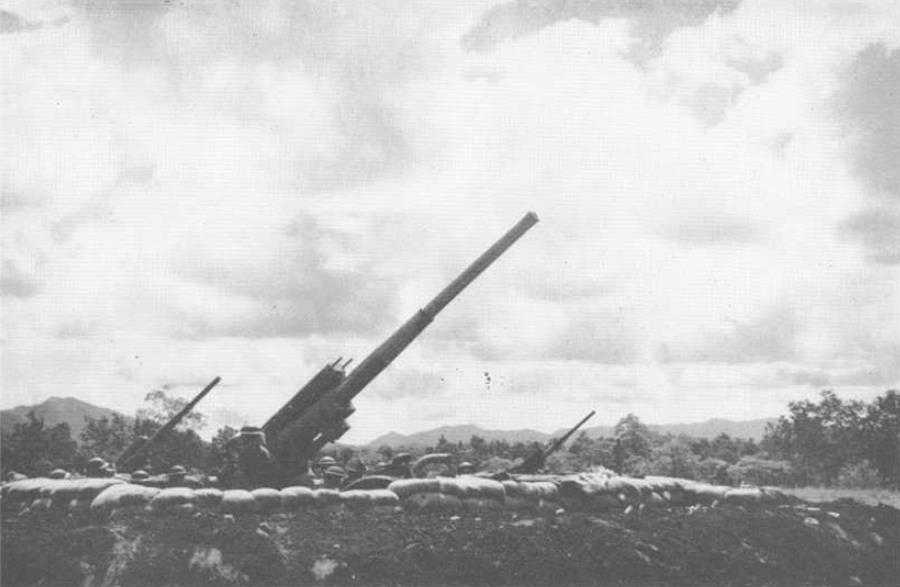
The anti-aircraft defences of Port Moresby were strengthened from April onwards by the arrival of AIF batteries, newly-returned from the Middle East. An anti-aircraft position at Port Moresby, July 1942. (AWM)

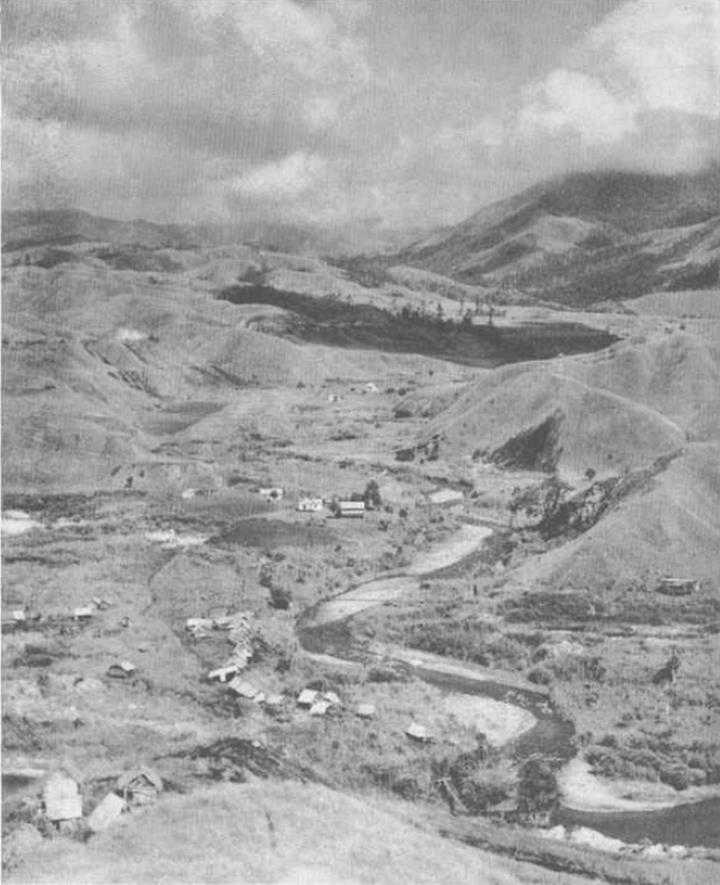
Salamaua, viewed from an observation point above Nuk Nuk. The airstrip is the cleared area in the centre of the picture, with the mouth of the Francisco River to the right. Salamaua itself was situated on the flat isthmus linking the promontory and the mainland. (AWM)
Kudjeru (looking north). where a section of the 1st independent Company was established in April 1942 to guard against possible Japanese movement south of Wau along the Bulldog Track. (AWM)

Members of the New Guinea Volunteer Rifles display a Japanese flag captured at Mubo on 21st July 1942. The group includes some of the outstanding NGVR scouts. Back row from left: G. R. Archer; J. Cavanaugh; L. E. Ashton: H. M. Shutt; J. G. Kinsey; F. L. Leather; J. B. McAdam; S. F. Burns; 1. H. Patterson; J. C. Shay. Front: J. A. Birrell; R. Napier; C. L. Cavalieri (behind Napier’s left shoulder); H. L. Harris (lying); A. McA. Graham; R. W. Doyle; H. J. W. Farr; W. Allen; G. R. Rayner (seated); A. R. Sheath. (AWM)
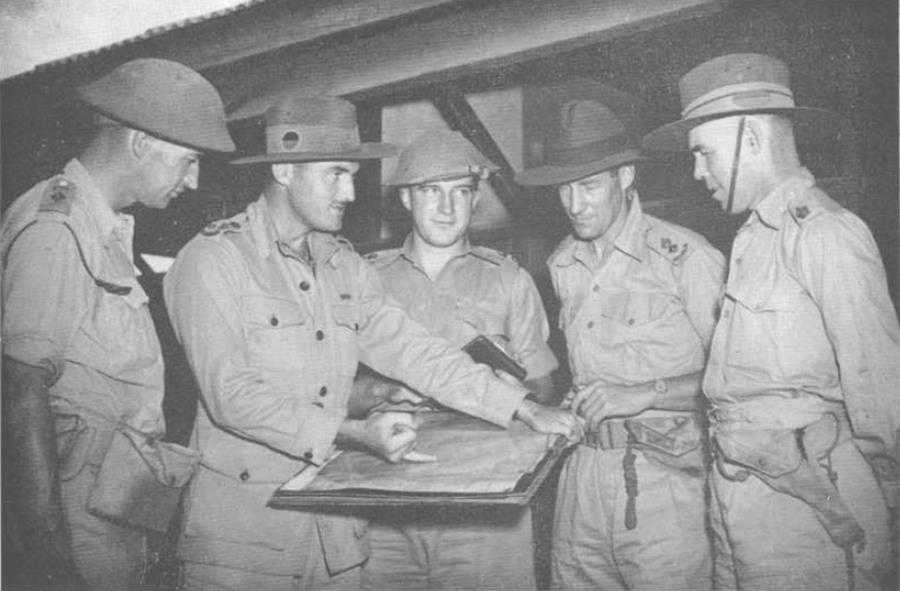
Lieut-Colonel O. A. Kessels, CO 49th Battalion; Brigadier S. H. W. C. Porter, commanding 30th Brigade; Lieut-Colonel N. L. Fleay. O.C. Kanga Force: Lieut-Colonel W. T. Owen, CO 39th Battalion; and Major J. A. E. Findlay, Owen’s second-in-command. Port Moresby, July 1942. (AWM)
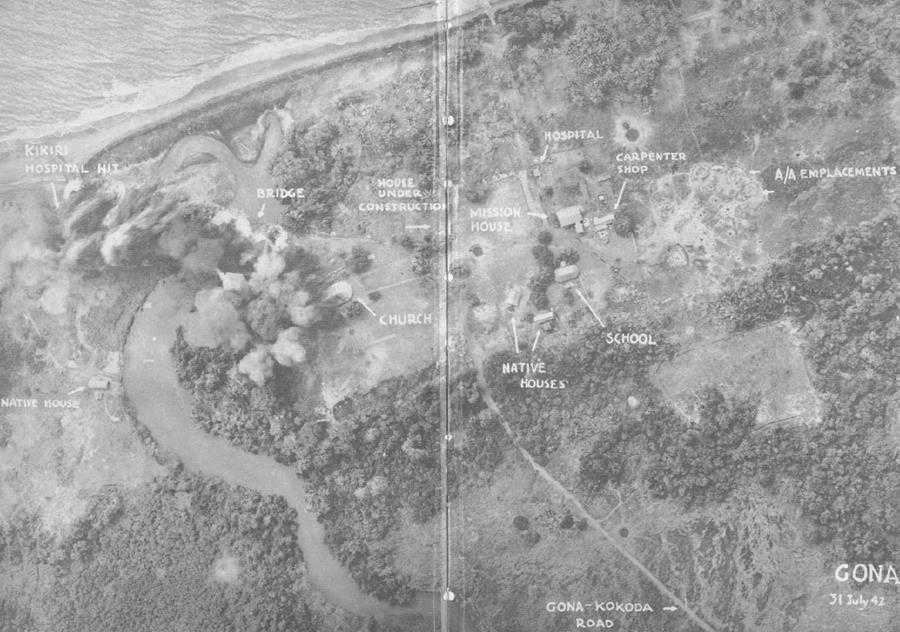
Gona Mission, 31st July 1942, ten day, after the Japanese landings in that area. (Allied Air Forces SWPA)
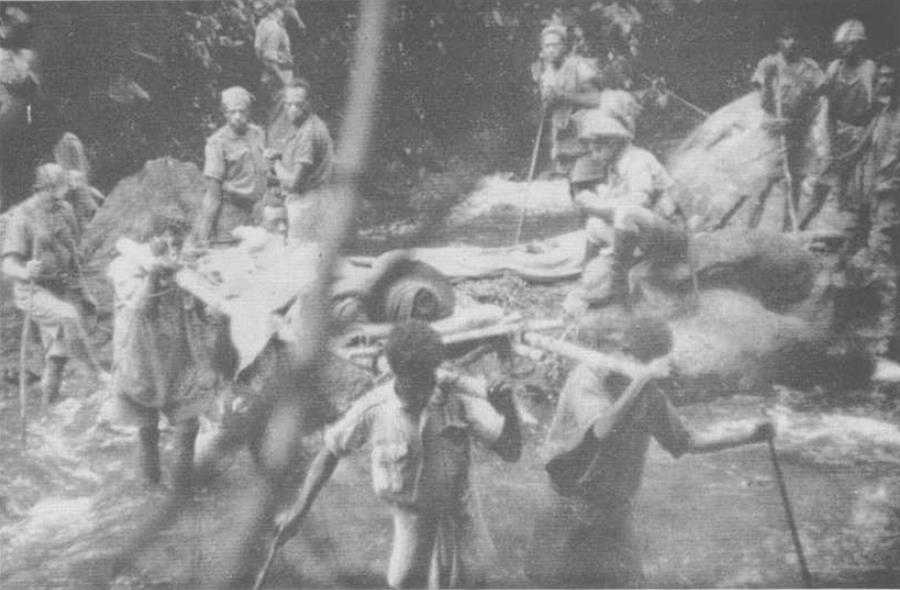
Native stretcher bearers negotiate the swift waters and rocky bottom of a creek in the Owen Stanleys. (AWM)

A wounded infantryman receives a light from a Salvation Army officer at a staging post in the Owen Stanleys. A stick such as that carried by the wounded soldier on the left was an essential part of equipment in the mountain ranges. (AWM)
Members of “D” Company. 39th Battalion on their way back to the base area. (AWM)

A parade of the 39th Battalion at Menari, where they were addressed by their commanding officer, Lieut-Colonel R. Homier, on 6th September. (AWM)
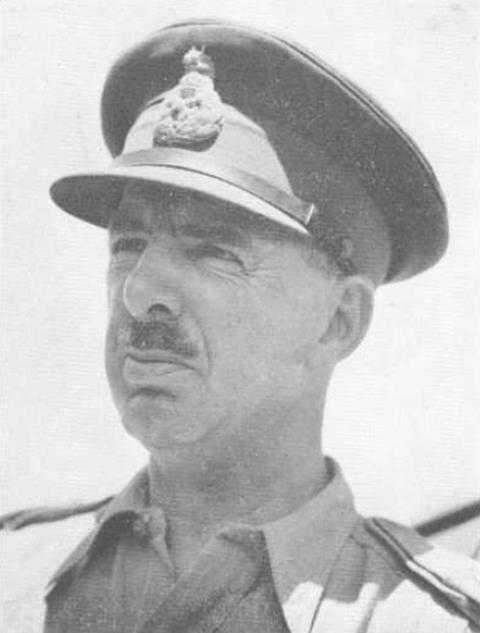
Major-General C. A. Clowes, commanding Milne Force. (AWM)
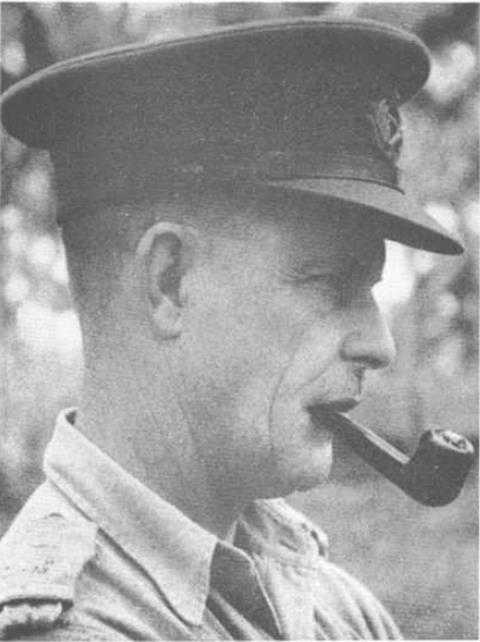
Lieut-General S. F. Rowell, GOC I Australian Corps. (AWM)
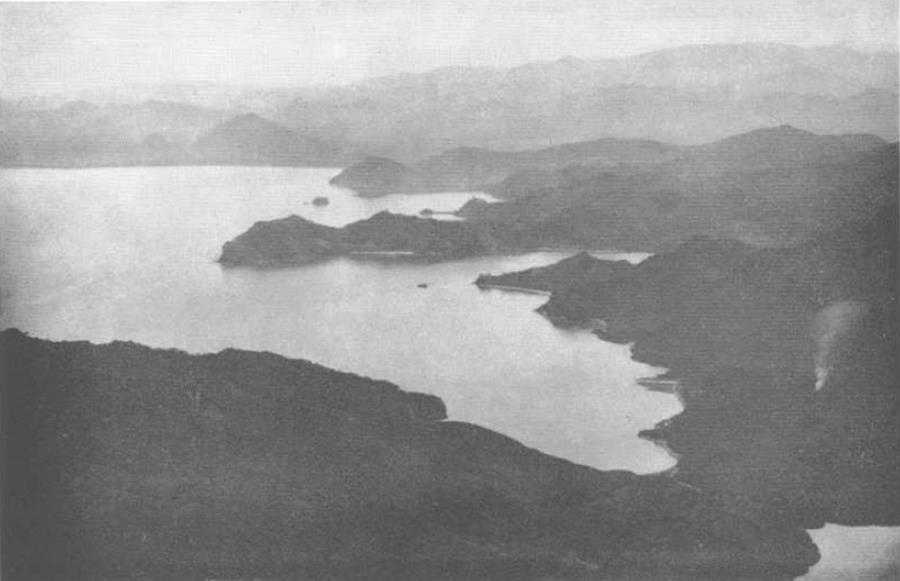
Milne Bay. (AWM)
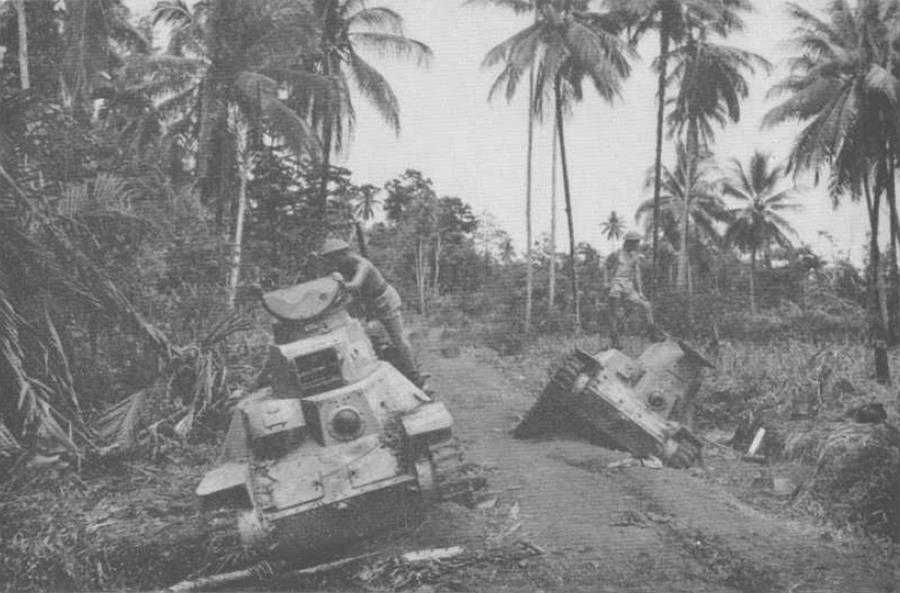
Japanese light tanks bogged and abandoned at Milne Bay, September 1942. (AWM)

M.V. Anshun, lying on her side at Gili Gili, where she was shelled and sunk by Japanese naval gunfire while unloading on the night of 6th September. The Anshun was later salvaged. (AWM)

In accordance with Allied plans to develop Australia as the major Pacific base. American forces began to arrive in increasing numbers. Newly-arrived American troops during kit inspection. (AWM)

In addition to the militia and the returning AIF divisions, the Australian Army possessed its own highly-trained 1st Armoured Division. AIF General Grant (medium) tanks. armed with 75-mm and 37-mm guns and machine-guns. at rest during training manoeuvres in Australia. (AWM)

Near Owers’ Corner the road ended and the track across the Owen Stanleys zigzagged in its sharp descent to Uberi. (AWM)
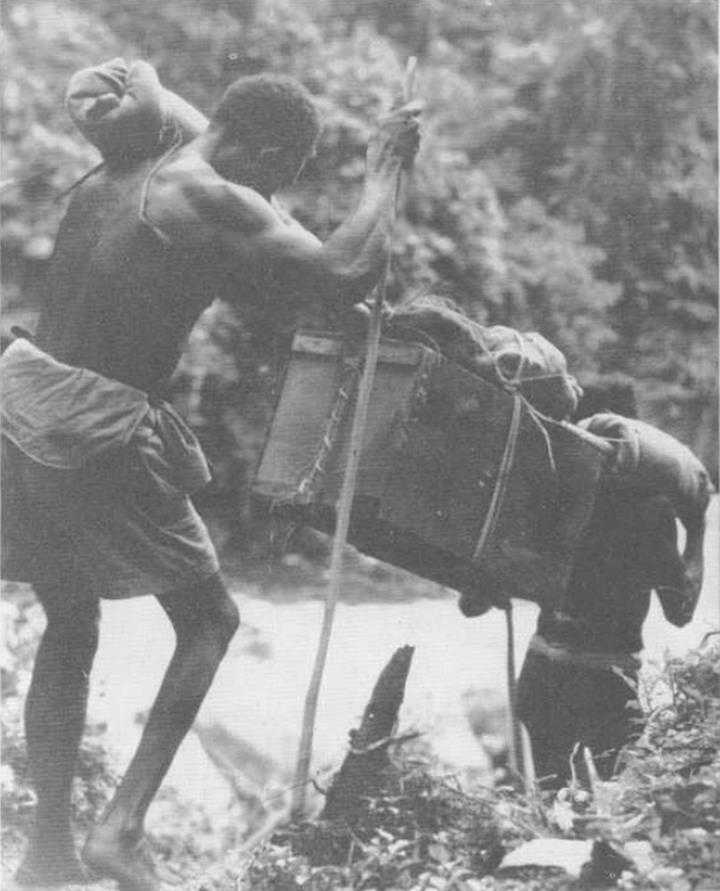
Native carriers on the Kokoda Track with a two-man load weighing about 70 lbs. (AWM)
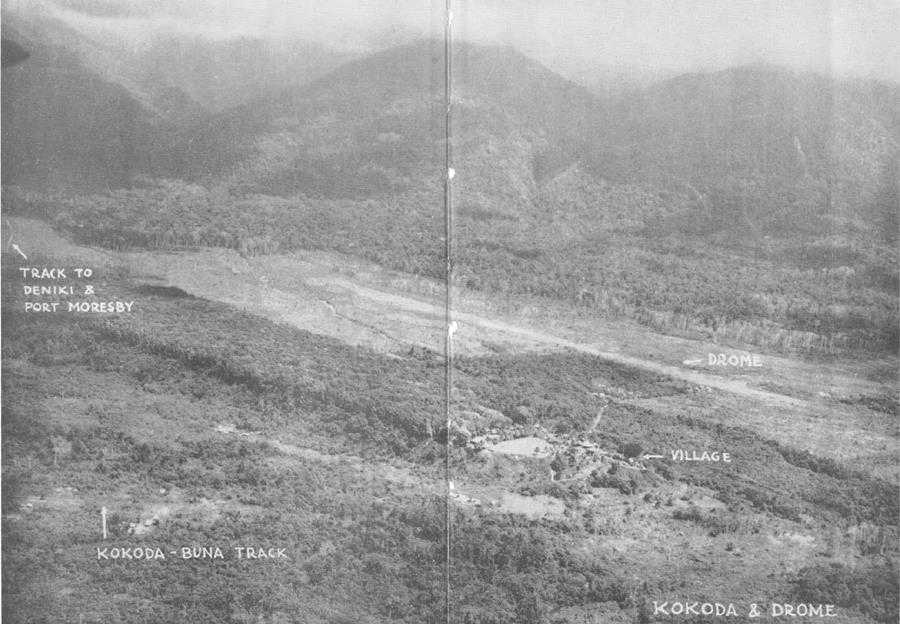
Kokoda village and airfield, 14th July 1942. (Allied Air Forces SWPA)
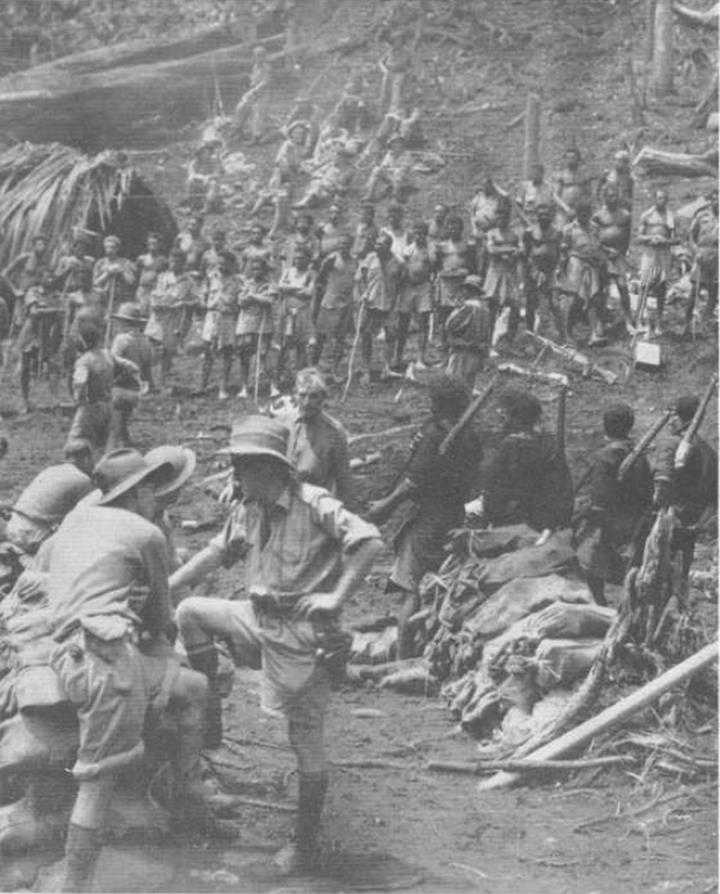
Native carrier line at Eora Creek village. The four natives on the right carrying rifles are members of the Royal Papuan Constabulary. (AWM)
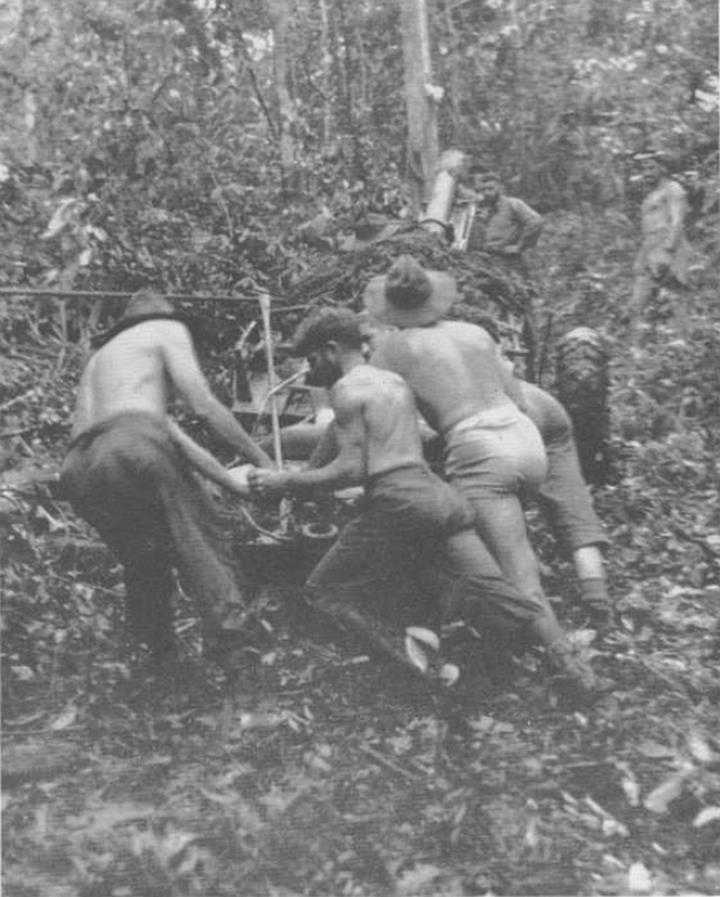
A 25-pounder of the 14th Field Regiment. The gun was eventually hauled into position for firing on the Japanese at Ioribaiwa. September 1942. (AWM)
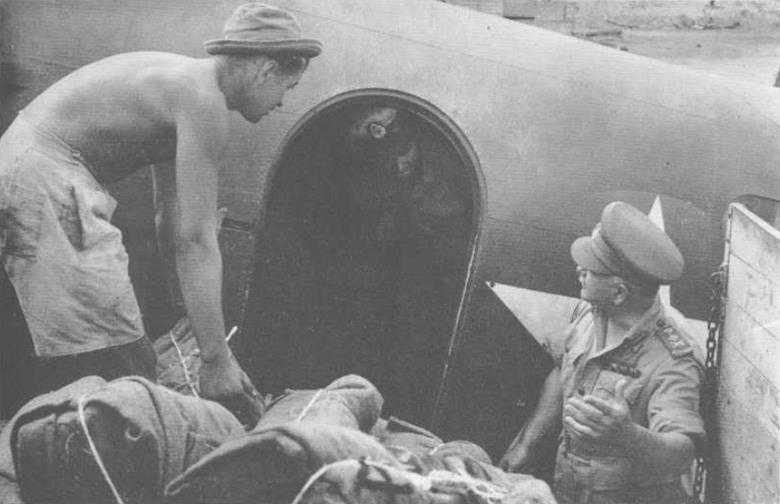
The troops in the forward areas depended for supplies largely on air drops and the native carrier-line. General Blamey watches ammunition wrapped in blankets for dropping being loaded into an American transport plane. (AWM)

A Douglas transport plane drops supplies near Nauro in the Owen Stanleys. [Australian War Memorial)
Brigadier A. W. Potts (left), commander of the 21st Brigade; Corporal R. Simpson. Potts’ driver; Captain J. K. Murdoch. staff captain 21st Brigade: Lieutenant A. L. Salem, liaison officer, 30th Brigade; and Captain C. L. Thompson, adjutant 2/14th Battalion. (AWM)

The Owen Stanleys, looking north from a high point near Nauro. (AWM)
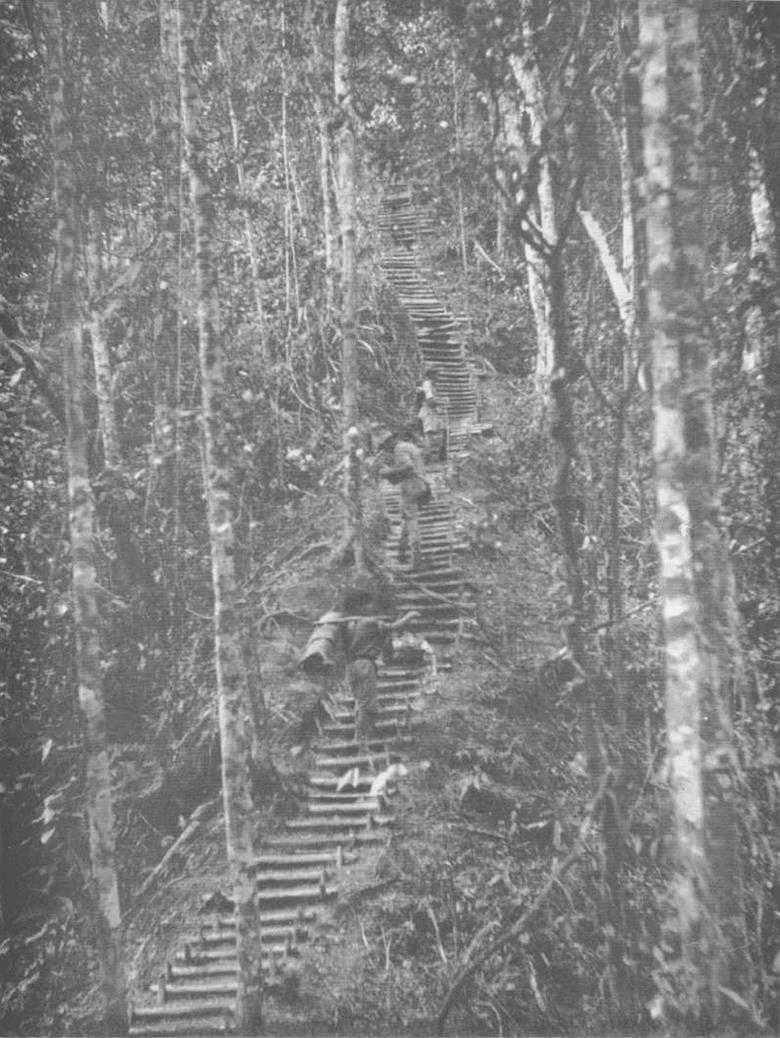
The so-called “Golden Stairs”, rising towards Imita Ridge, each step battened at its edge by a rough log, sometimes broken and therefore treacherous, and cradling mud and water from the afternoon rains. (AWM)

Brigadier K. W. Eather (left/. commander of the 25th Brigade. and Major-General A. S. Allen, GOC 7th Division. September 1942. (AWM)
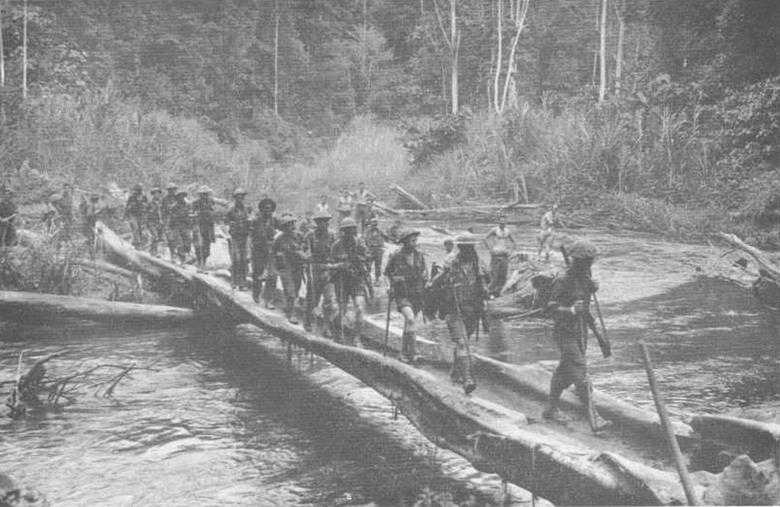
The 2/33rd Battalion crossing the log bridge over the Brown River on the way from Nauro to Menari. October 1942. (AWM)

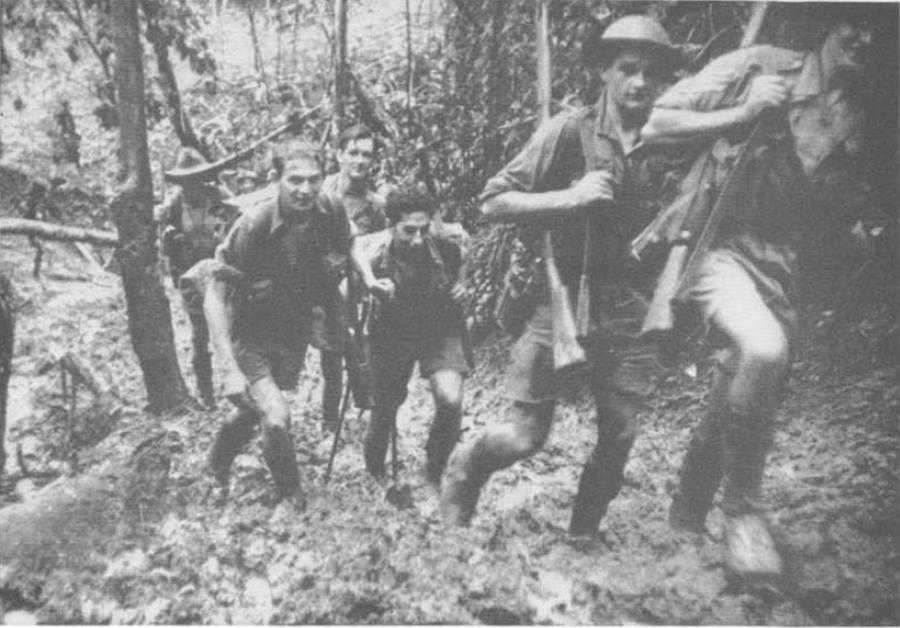
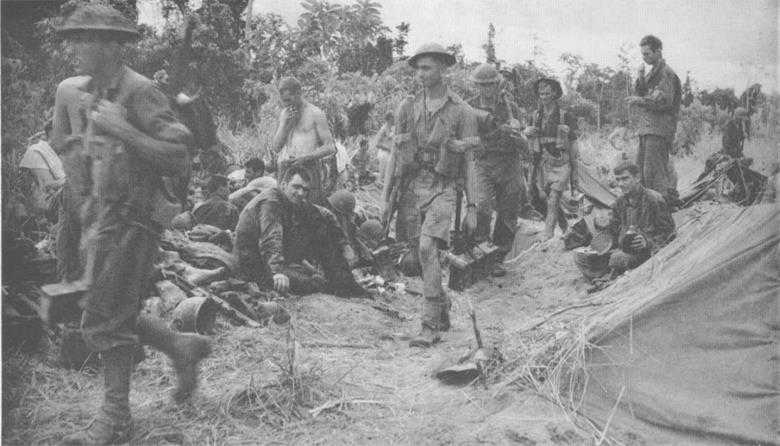
Survivors of the 2/27th Battalion at Itiki. This group had been out of touch in the Owen Stanleys for thirteen days.(AWM)
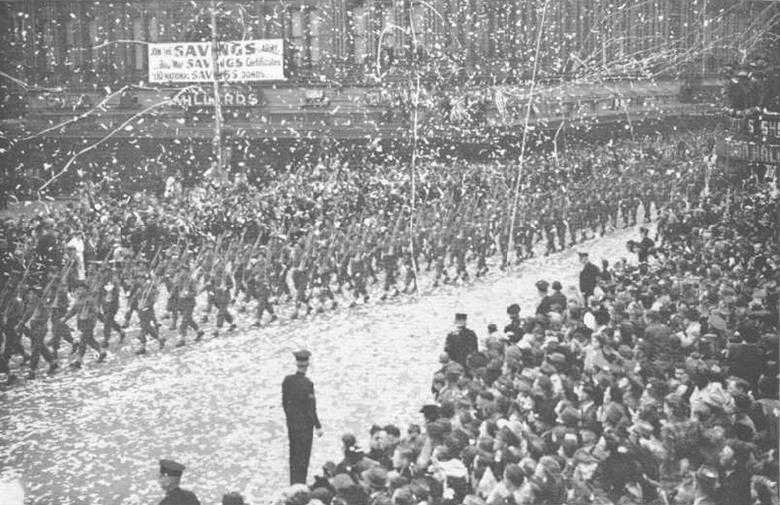
The march of the 16th Brigade through Sydney on 5th September was a tumultuous affair of cheers and drifting paper, Eight days later the brigade sailed for New Guinea.(AWM)
On 2nd October the 16th Brigade began to move forward from Owers Corner towards Templeton’s Crossing. A halt on the track between Nauro and Menari.(AWM)

Members of the 16th Brigade reaching the crest of a ridge on the way forward to Templeton’s Crossing. (AWM)

The Minister for the Army, Mr F. M. Forde, General Douglas MacArthur, and General Sir Thomas Blamey. General MacArthur was paying his first visit to New Guinea. Port Moresby, 2nd October 1942. (AWM)
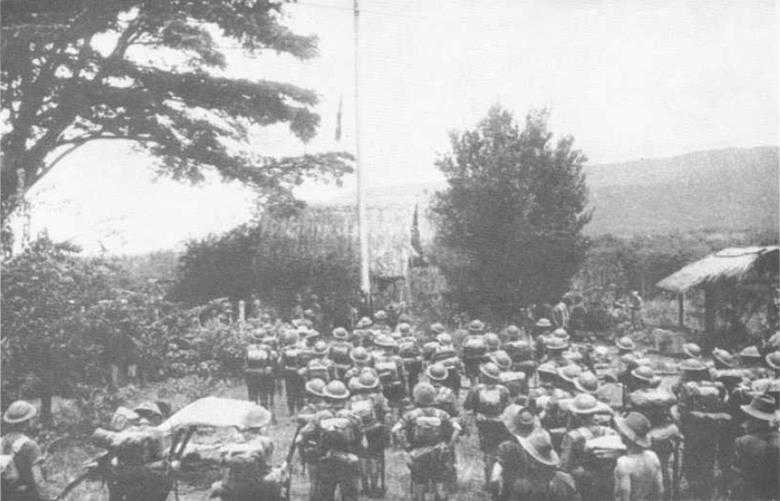
The ceremony of hoisting the flag performed by Major-General G. A. Vasey. GOC 7th Division, after the recapture of Kokoda on 2nd November 1942. (AWM)

The 2/10th Battalion was flown into Wanigela from Milne Bay on 5th and 6th October. followed by the 2/6th Independent Company and the 128th U.S. Regiment from Port Moresby in mid-October. This group at Wanigela includes {front row from left) Lieutenant P. C. Bennett, 2/6th Independent Company: Major H. G. Harcourt, O.C. 2/6th; Brig-General J. Hanford MacNider (seated on box); Major Chester M. Beaver of the 32nd U.S. Division’s staff (kneeling); and, back row, standing, fourth from left. Lieut-Colonel J. G. Dobbs. C.O. 2/10th Battalion; Major J. H. Trcvivian, 2/10th Battalion; Lieutenant F. W. G. Andersen, Angau; and Captain T. J. Schmedje. 2/10th Battalion. (AWM)
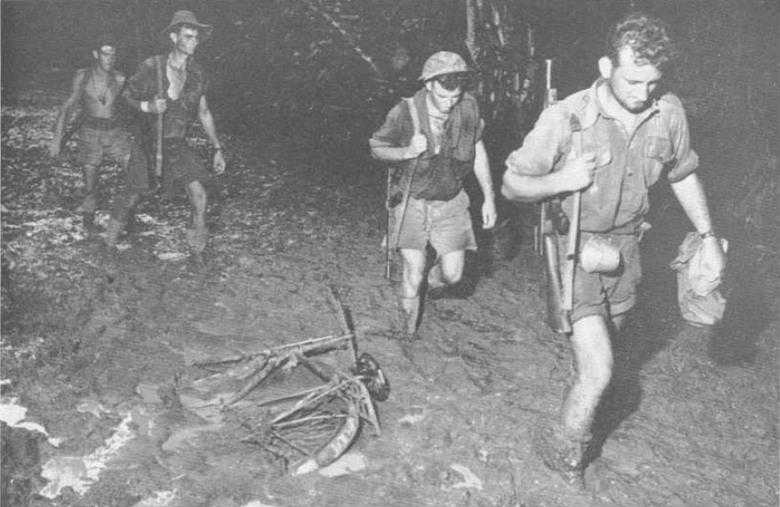
The Kokoda–Wairopi track, near Oivi.(AWM)

Wounded Australians from the Oivi–Gorari battle at the MDS Kokoda, November 1942.(AWM)
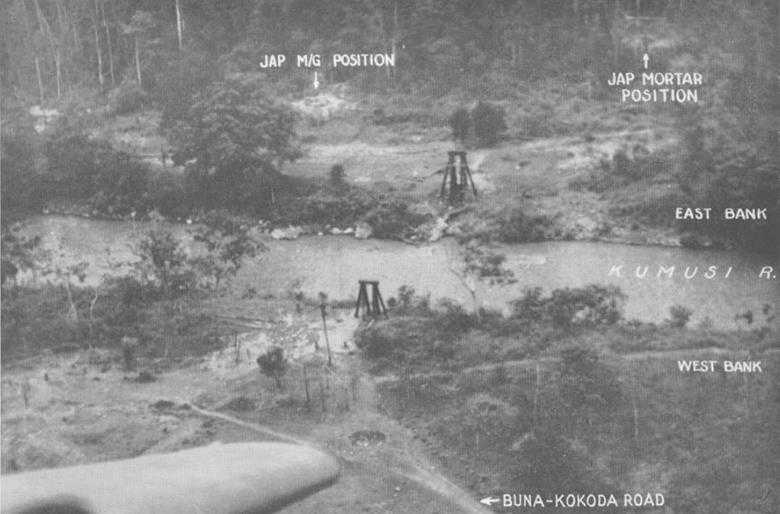
The destruction of the Wairopi bridge, 21st October 1942.(Allied Air Forces SWPA)
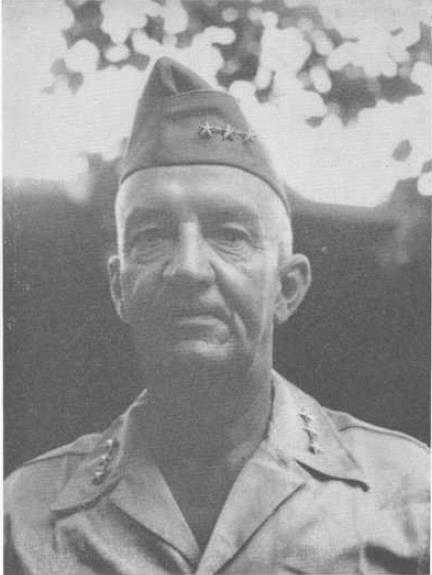
Lieut-General Robert L. Eichelberger, Commanding General I U.S. Corps. (AWM)
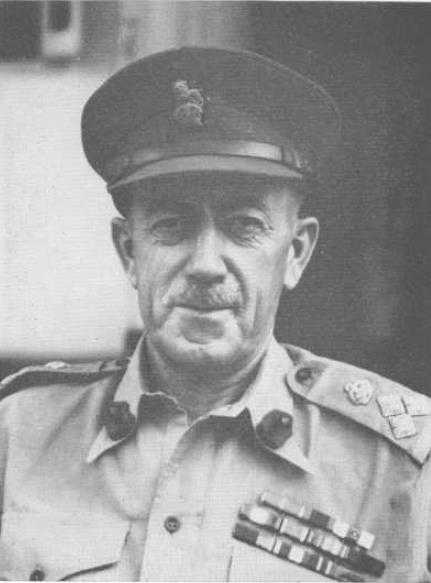
Brigadier J. E. Lloyd, commander of the 16th Brigade.(AWM)
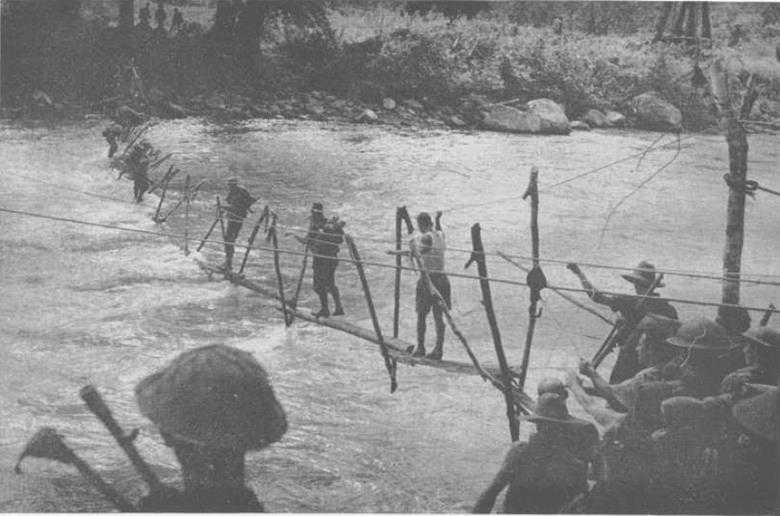
Crossing the Kumusi River at Wairopi on a makeshift bridge constructed by Australian engineers. November 1942.(AWM)

Allied aircraft bomb Japanese positions in bush near Gona (AWM)

An RAAF Wirraway comes in at tree-top level to machine-gun Japanese positions at Gona (AWM)
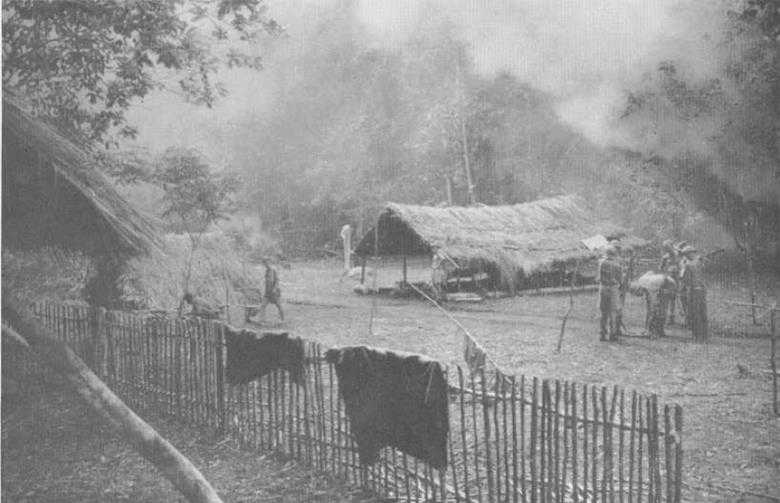
An aid post erected by natives on the track to Gona. The smoke in the background is from camp fires. (AWM)

Corporal F. R. Smith and Private W. A. Musgrove, members of a company of the 2/33rd Battalion which had just withdrawn 100 yards from the front-line after two days and nights within grenade distance of the Japanese. The Australians are sheltering in five-foot kunai grass close to the fringe of bush surrounding Gona. (AWM)
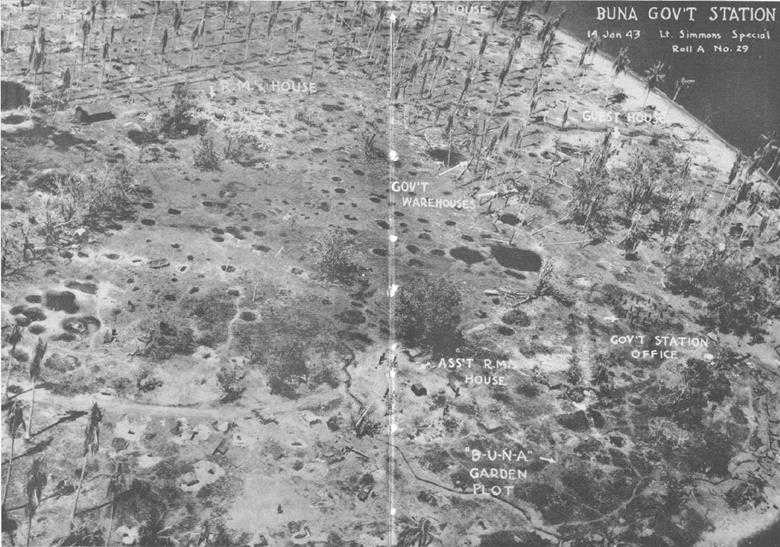
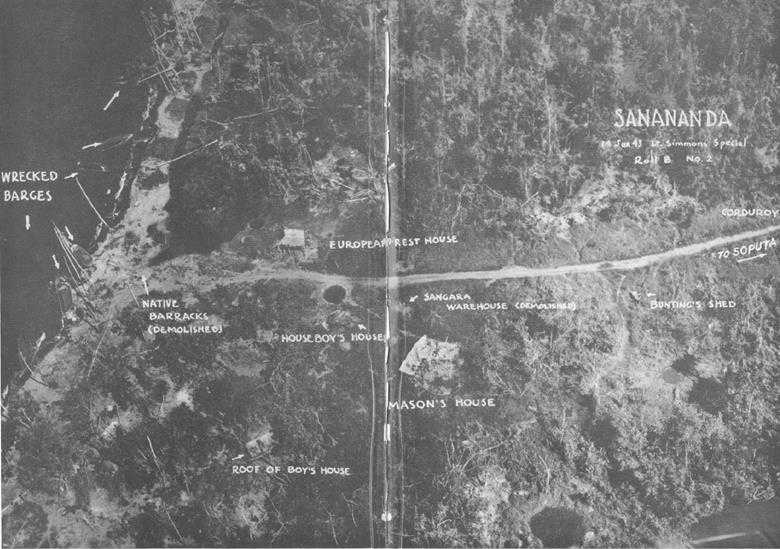
The remains of Buna Government Station, a desolate area of bomb craters, twisted coconut trees, and the burnt and blackened stumps of government buildings, after it was finally overrun by the 128th U.S. Regiment on 2nd January 1943. (Allied Air Forces SWPA)

The wounds of an Australian infantryman, hit by mortar burst in the head, thigh and arm, are dressed in the shelter of tall kunai grass at Gona. (AWM)
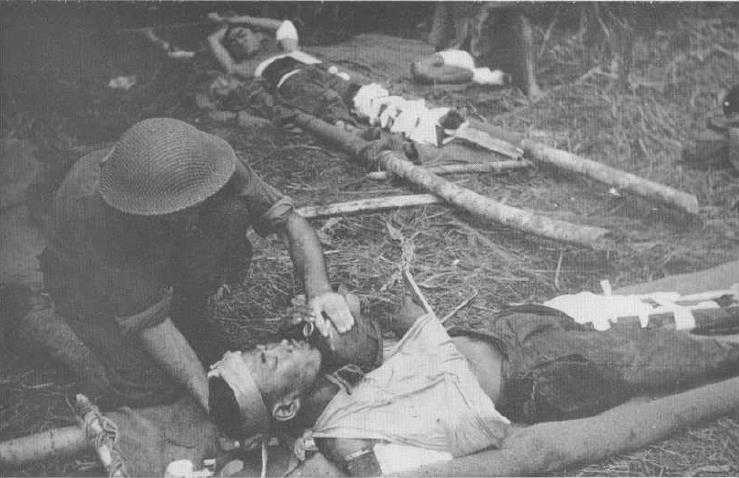
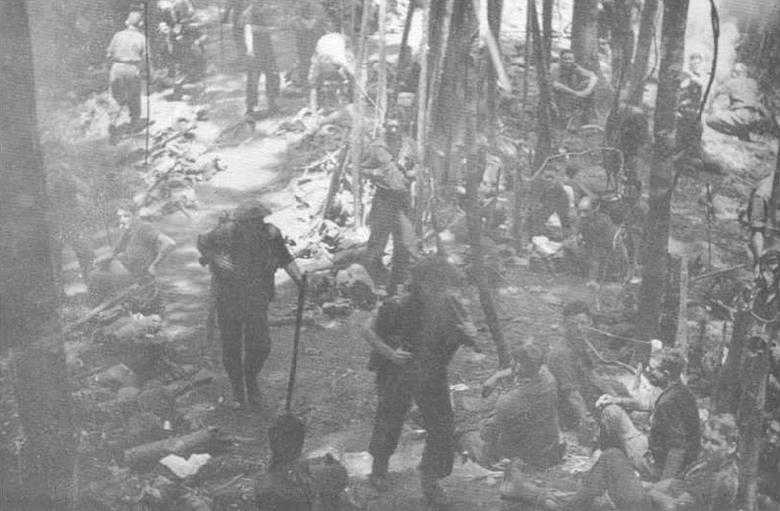
Japanese, wounded in the final Australian assault on Gona, lie on rough bush stretchers, awaiting evacuation. An Australian raises a wounded prisoner’s head to drink. (AWM)

Major-General G. A. Vasey. GOC 7th Division: Brigadier J. R. Broadbent, DA&QMG I Corps: Brigadier G. F. Wootten, commander of the 18th Brigade: and Lieut-General E. F. Herring, GOC New Guinea Force, in Brigadier Wootten’s tent at Sanananda. (AWM)
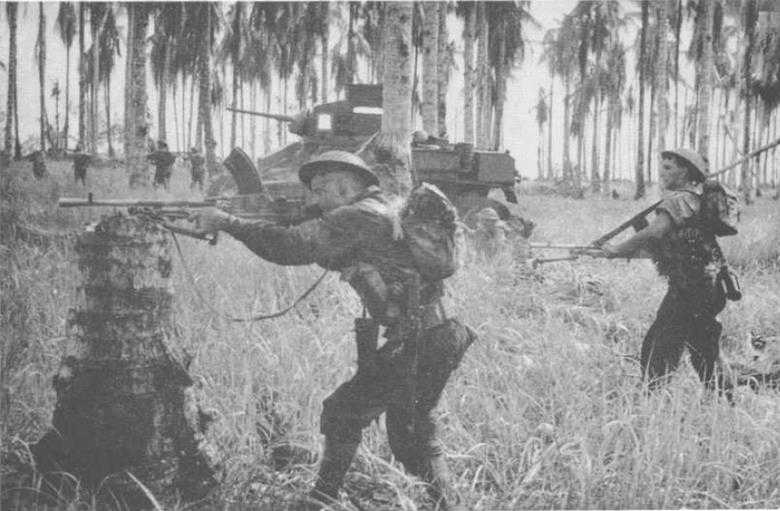
The advance of the 2/9th Battalion, supported by tanks of the 2/6th Armoured Regiment, to Cape Endaiadere, 18th December 1942. (AWM)
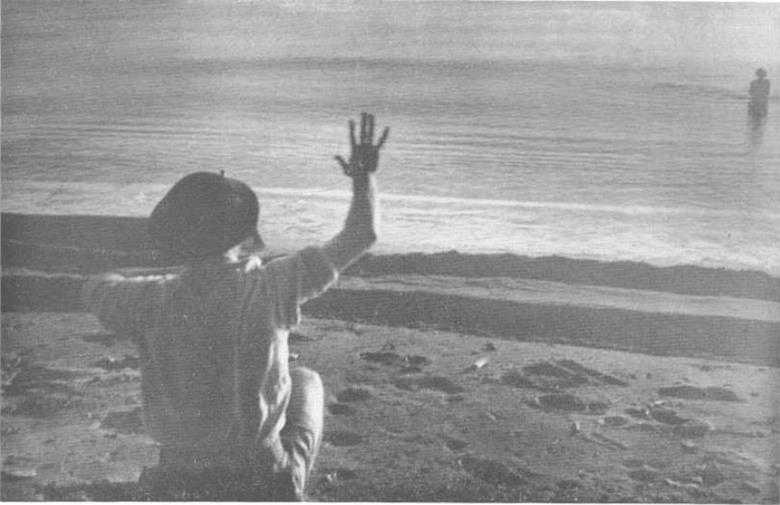
At Cape Endaiadere on 18th December four Japanese attempted a desperate swim for freedom. Three were shot by this Australian: the fourth comes in towards the shore. “Put your hands up,” the Australian shouts, demonstrating with his raised hand. (AWM)
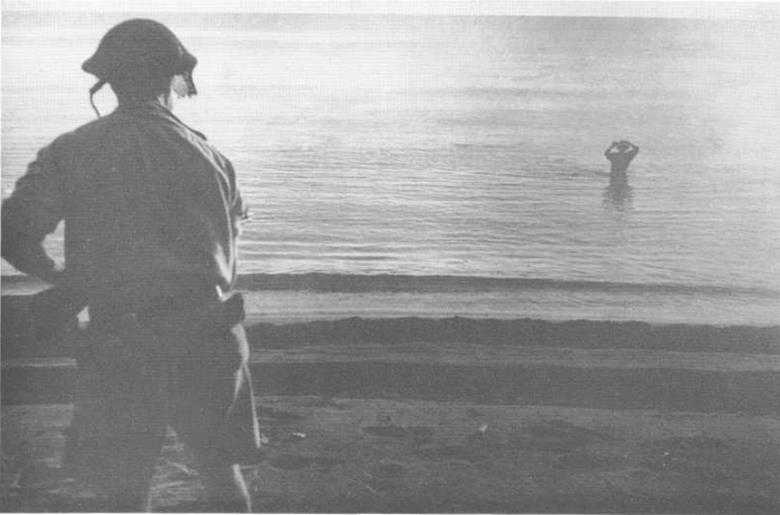
The Japanese raises his hand revealing a grenade. The Australian leaps to his feet. calling to the Japanese to drop it. The Japanese fuses the grenade and places it to his head. These pictures illustrate the disregard of the Japanese defenders for their own lives and their determination never to surrender. (AWM)
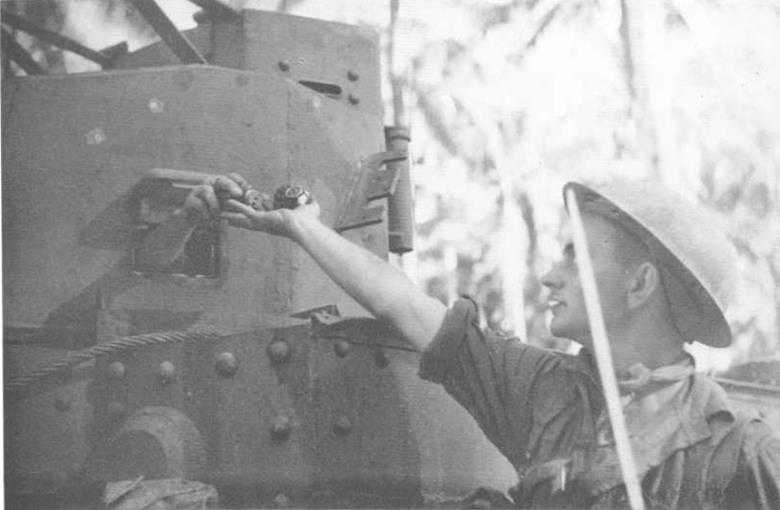
Infantry-tank cooperation during the advance of the 2/9th Battalion to Cape Endaiadere, 18th December 1942. An infantryman collects grenades from a General Stuart tank during the fighting. (AWM)
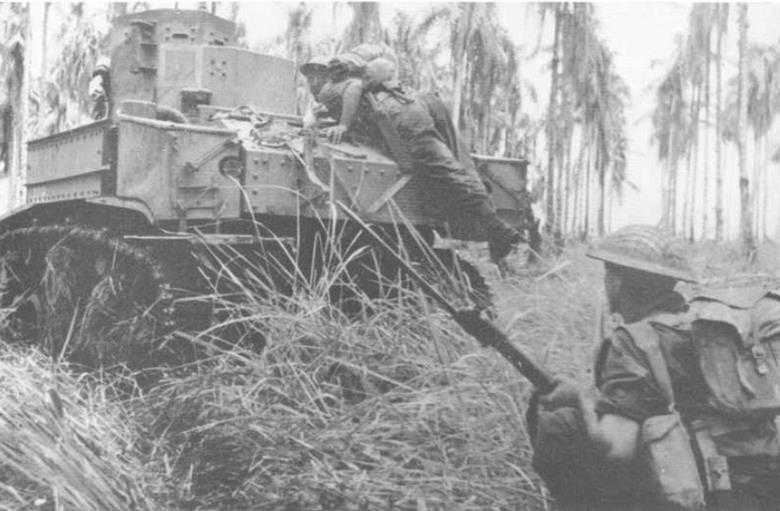
An infantry officer passes a note to a tank crew warning them of a Japanese pill-box to the right, while the tank fires on a pill-box ahead. (AWM)
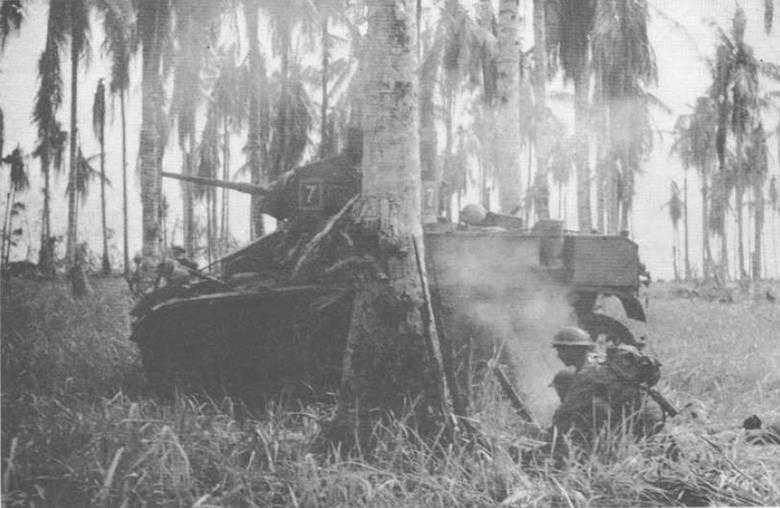
Giropa Point, 1st–2nd January. Australian Bren gunners fire on Japanese fleeing from a wrecked pill-box 100-150 yards ahead. The tank’s identification sign and number have been deleted from the photograph by the wartime censor. (AWM)
Giropa Point. A close-up of the same tank (7 Troop, “B” Squadron, 2/6th Armoured Regiment) with a 2-inch mortar crew firing on the fleeing Japanese from the shelter of a torn coconut tree. (AWM)

“Get down, you bloody fool. They’ve just got my cobber,” the machine-gunner said to the photographer, George Silk, as he swung his Vickers viciously across the treetops to clear them of Japanese snipers. Silk, employed by the Australian Department of Information as an Official Photographer, took more than 20 of the photographs of the coastal battles used to illustrate this volume. (AWM)

Giropa Point. A dead Japanese lies in front of a smashed pill-box. The Australian on the right is Lieutenant D. S. Clarke of the 2/12th Battalion. (AWM)
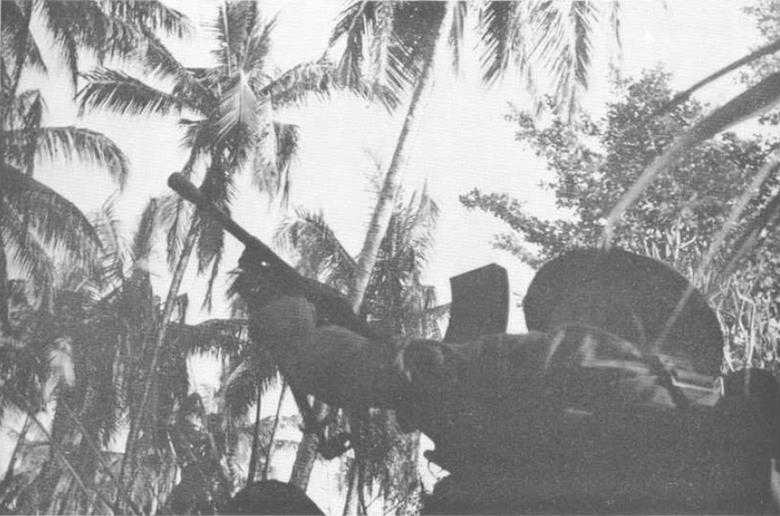
An Australian uses a Bren gun to clear a coconut tree of a Japanese sniper. (AWM)

The sniper lies dead beside his smashed rifle and the tree-top. (AWM)
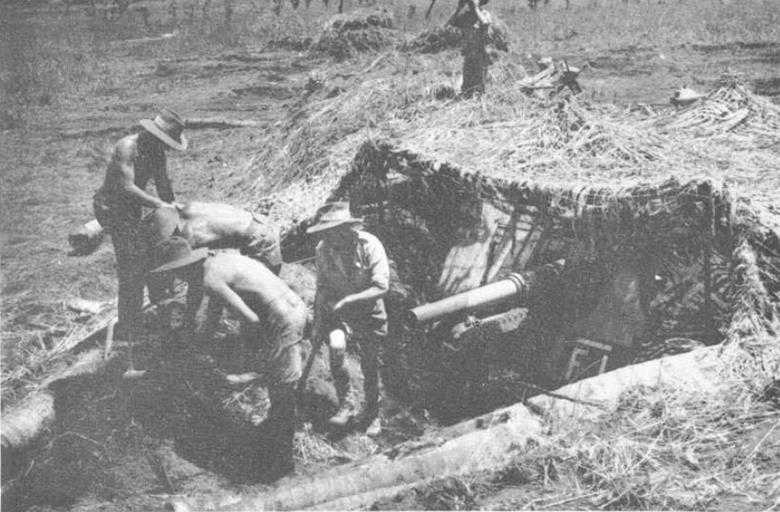
Strengthening a 25-pounder gun emplacement of the 2/5th Field Regiment at Buna. Known as “Carson’s Gun” it was sited between the two strips and west of the bridge across Simemi Creek. Left to right: Gunner Mick Williams (on loan from the 2/1st Field Regiment): Gunners J. Webster, A. S. Meecham, Sergeant R. G. Carson, and WO2 J. Puxty (with binoculars) of the 2/5th. (AWM)

Major W. H. Hall. the commander of the 2/5th Field Regiment battery at Buna, observing from Captain T. J. Handran-Smith’s OP in a 70-foot banyan tree sited about 1,300 yards forward of “Carson’s Gun” and in the bush off the southern side of Old Strip. (AWM)

Gona, during a lull in the fighting. A variety of mess equipment was used by the Australians. The Australian standing is holding the bottom portion of a Japanese mess kit; another is scooping water from the creek in a blackened tin probably used also as a billy-can; the soldier on the right is drinking from the corner of an Australian dixie. (AWM)

Christmas Day at Buna 1942. A wounded soldier, Pte G. C. Whittington of the 2/10th Battalion, gropes his way to an aid station, guided by a Papuan boy. An emergency field dressing covers Whittington’s wounds, from which he died later. (AWM)
Australian infantrymen move forward through a group of Americans to take up the fight at Sanananda. (AWM)
Sanananda. Its fall marked the end of the fighting in Papua, and the end of an experience which none of the hardened soldiers who survived it will ever forget. (Allied Air Forces SWPA)
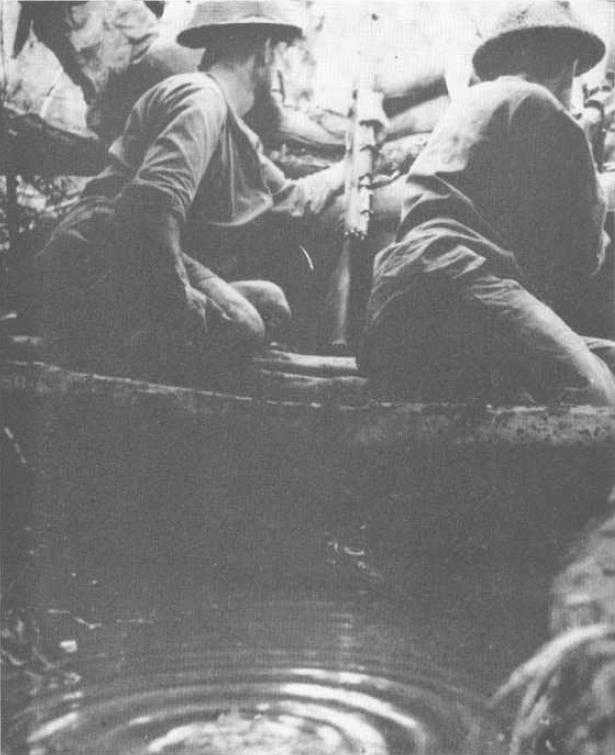
Water, mud and slush were inseparable companions of the Allied troops during the advance on Sanananda. (AWM)
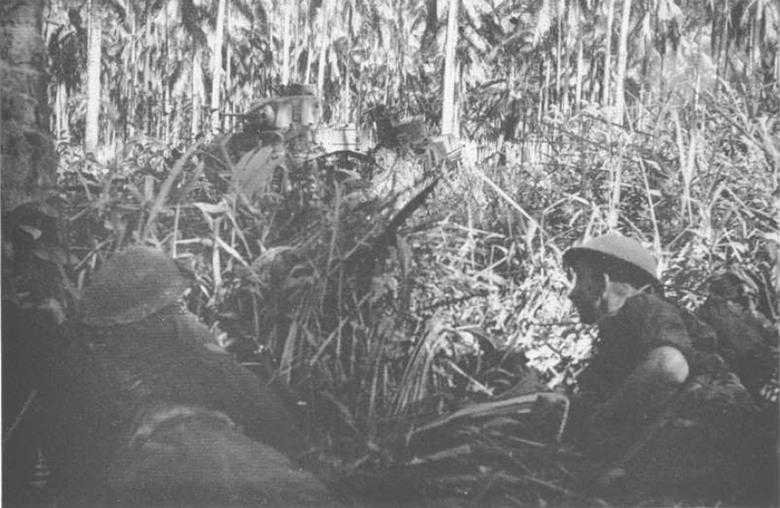
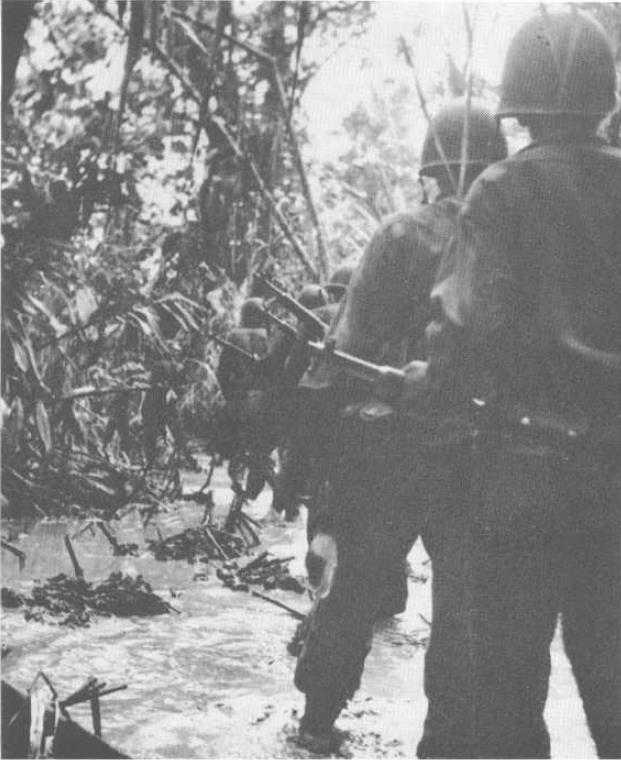
An Australian section post on the Sanananda Track, less than 30 yards from Japanese positions. (AWM)
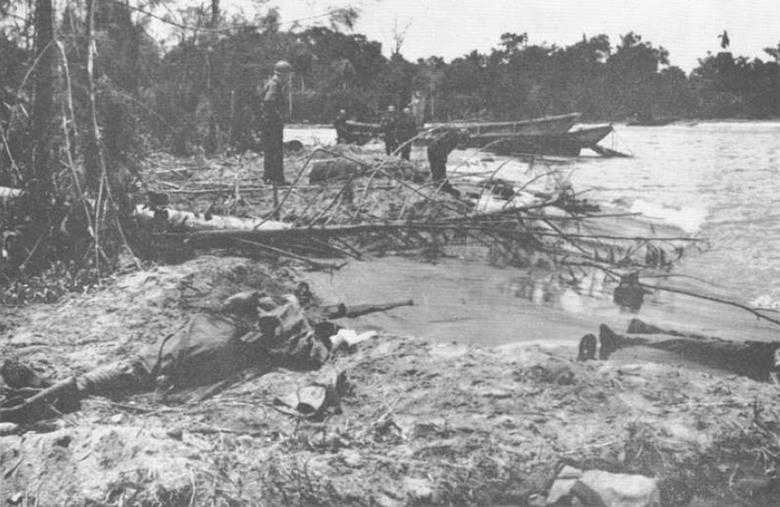
Wrecked Japanese barges, pieces of equipment and the bodies of the dead littered the beaches at Buna when the fighting ended. (AWM)
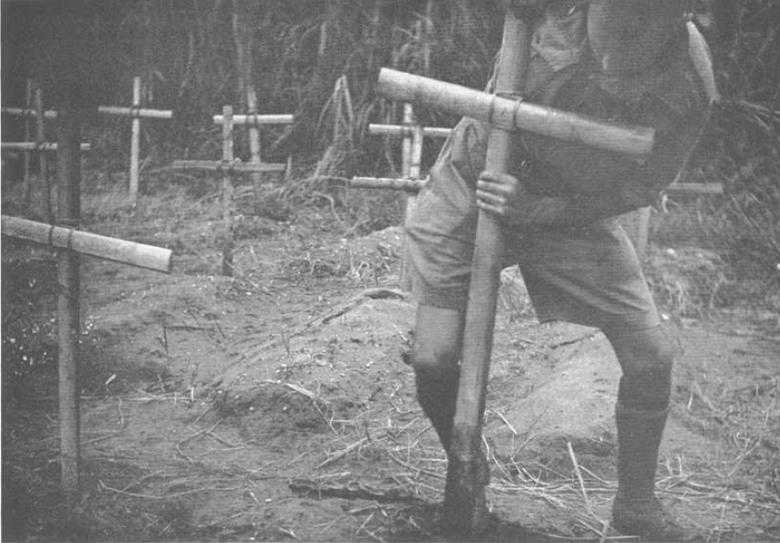
An Australian padre, Chaplain A. E. Begbie, erects a temporary wooden cross over an Australian grave at Gona. (AWM)

An aerial view of Wau airfield during the Japanese attack, January 1943. (AWM)

The 17th Brigade was flown in to defend Wau. These infantrymen are leaving a transport plane to go into action. (AWM)
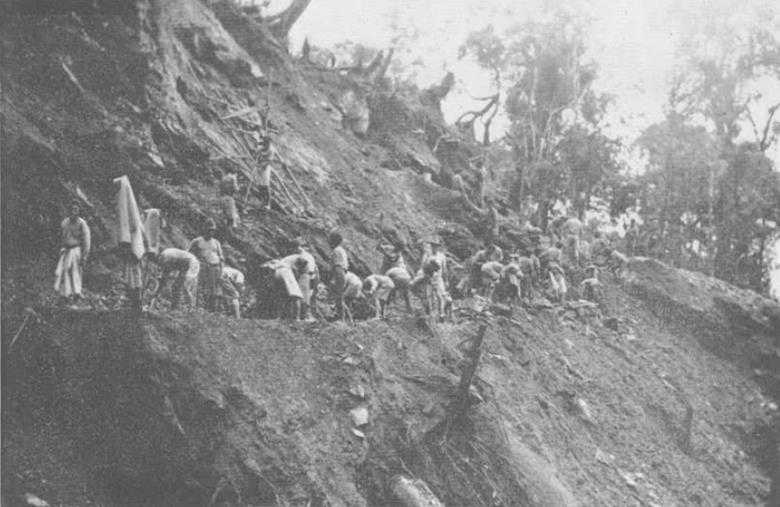
A section of the Wau–Bulldog road. (AWM)
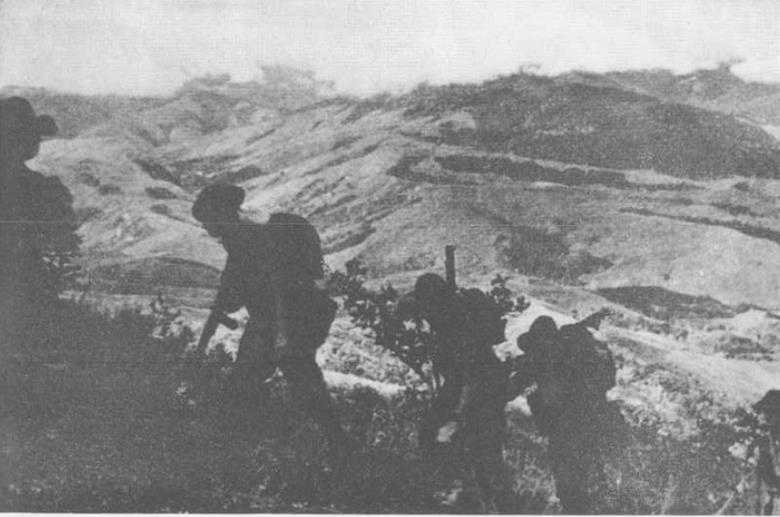
Australian troops on the move forward from Wau. (AWM)
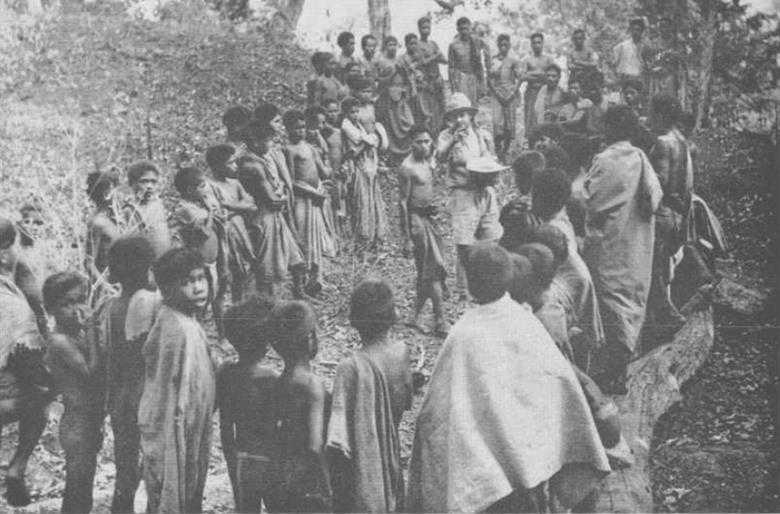
A line-up of native boys in Portuguese Timor, October-November 1942. They are being paid for building a hut for the Australians. The survival of the guerrillas in Timor depended largely on the friendliness and cooperation of the native population. (AWM)
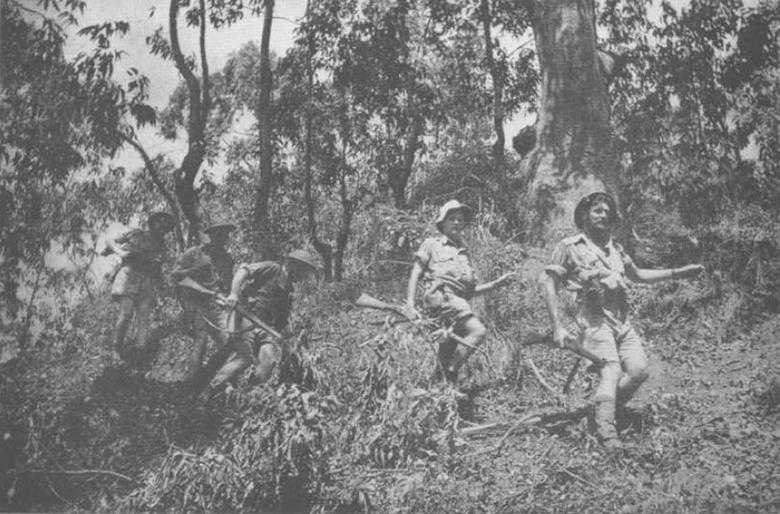
An Australian patrol in Portuguese Timor, October–November 1942. Left to right: Corporal J. H. Sargeant. 2/1st Fortress Sigs; Privates 3. B. Williams, C. Chopping, W. A. Crossing and Sergeant A. E. Smith, 2/2nd Independent Company. (AWM)